Hosted Page
Overview and details on creating and modifying a RevCent Hosted Page
The beginning URL for all RevCent hosted solutions is https://securehost.revcent.com/
The hosted page is the secondary path, after the hosted endpoint path, in the url. Example: https://securehost.revcent.com/hosted_endpoint/hosted_page
You can add use custom path name for a hosted page or use the hosted page ID.
Note: If you have not created a hosted endpoint in RevCent please follow the instructions on creating a hosted endpoint.
Why Use A Hosted Page?
- Allow customers to checkout using a credit card or PayPal without hosting your own website.
- Customer registration, login and account pages ready to go.
- Create a new hosted page and send traffic to it in minutes.
- Fully customizable with pre-built templates.
- Create as many hosted pages as you want.
Before You Start
This guide assumes the entities below have already been created.
Hosted Endpoint Created
If you have not created a hosted endpoint in RevCent please follow the instructions on Creating A Hosted Endpoint.
Hosted Page Template Created
If you have not created a hosted page template in RevCent please follow the instructions on Creating A Hosted Page Template.
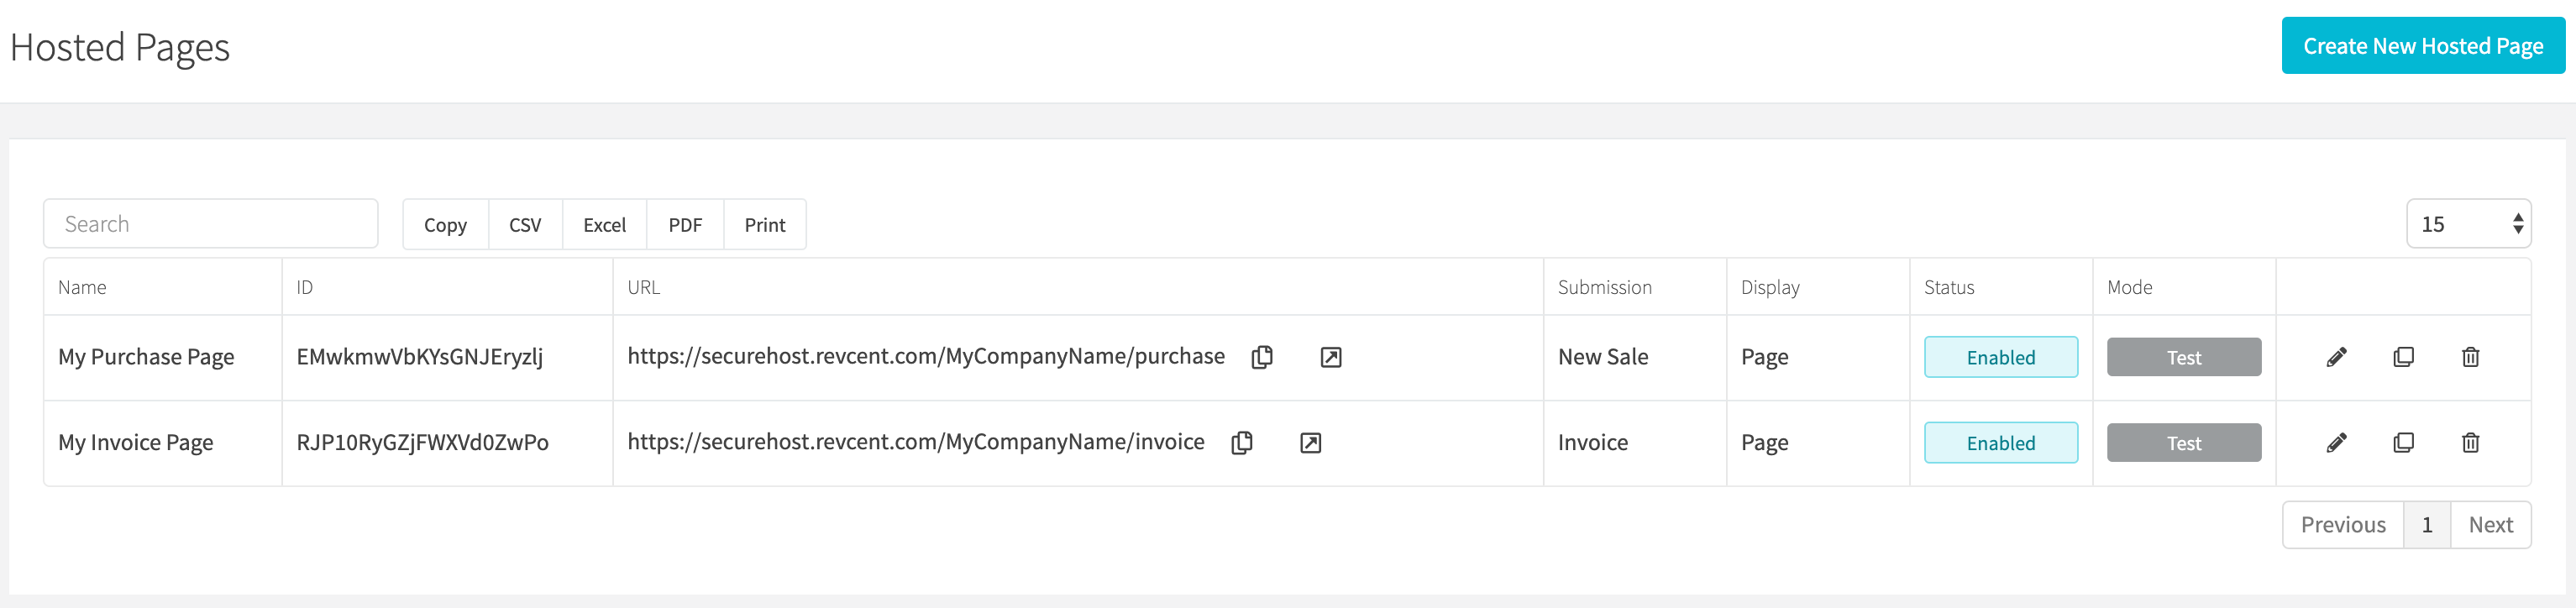
View Hosted Pages
View all hosted pages by clicking Integrations > RevCent Hosted > Pages in the sidebar, or go to https://revcent.com/user/hosted-pages
Create A Hosted Page
Create a new hosted page by clicking the Create New Hosted Page button when viewing all hosted pages or go to https://revcent.com/user/hosted-pages
Note: If you have not created a hosted endpoint in RevCent please follow the instructions on creating a hosted endpoint.
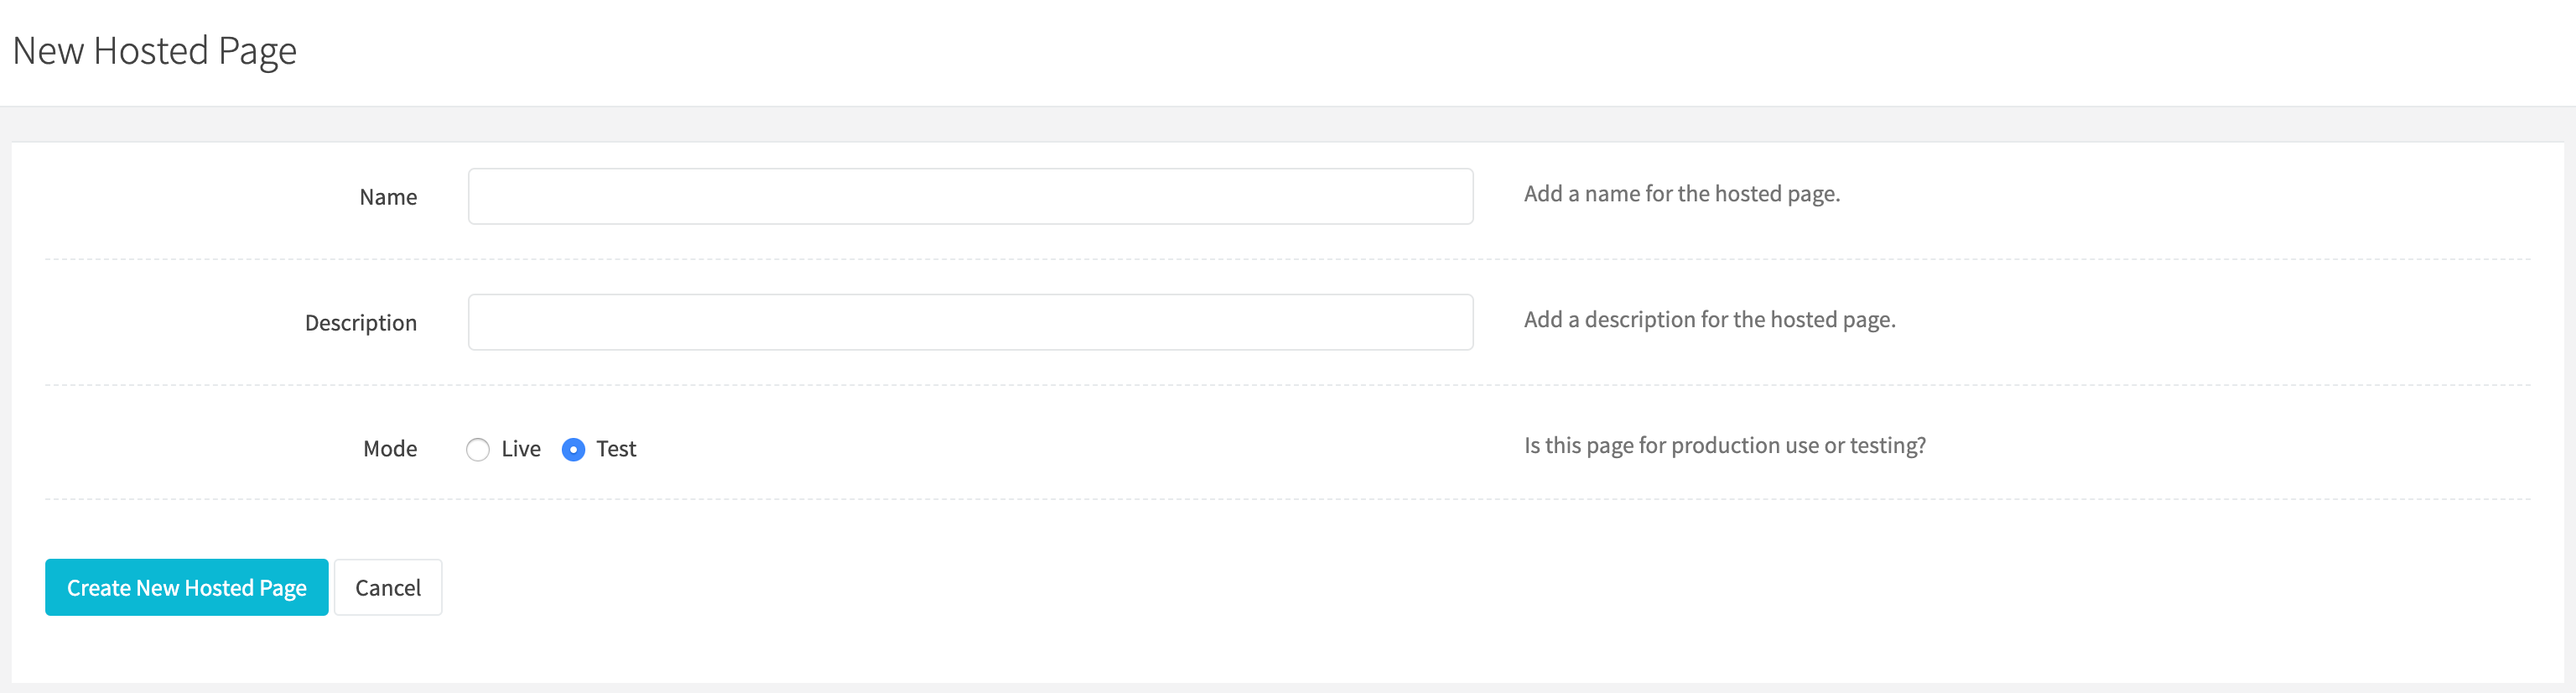
Name
Set a name for the hosted page.
Description
Set a description for the hosted page.
Mode
Set the mode for the hosted page.
Options:
- Live: Will send transactions to your gateway’s live endpoint. Use live mode when you are ready to process real transactions.
- Test: Will send transactions to your gateway’s text/sandbox endpoint. Use test mode when testing your hosted page.
Once the hosted page is created you will be forwarded to the Edit Hosted Page for the new hosted page. You can then customize the hosted page. Continue to the Edit A Hosted Page section below.
Edit A Hosted Page
Edit an existing hosted page by clicking the edit icon when viewing all hosted pages.
Note: If you have not created a hosted endpoint in RevCent please follow the instructions on creating a hosted endpoint.
Details
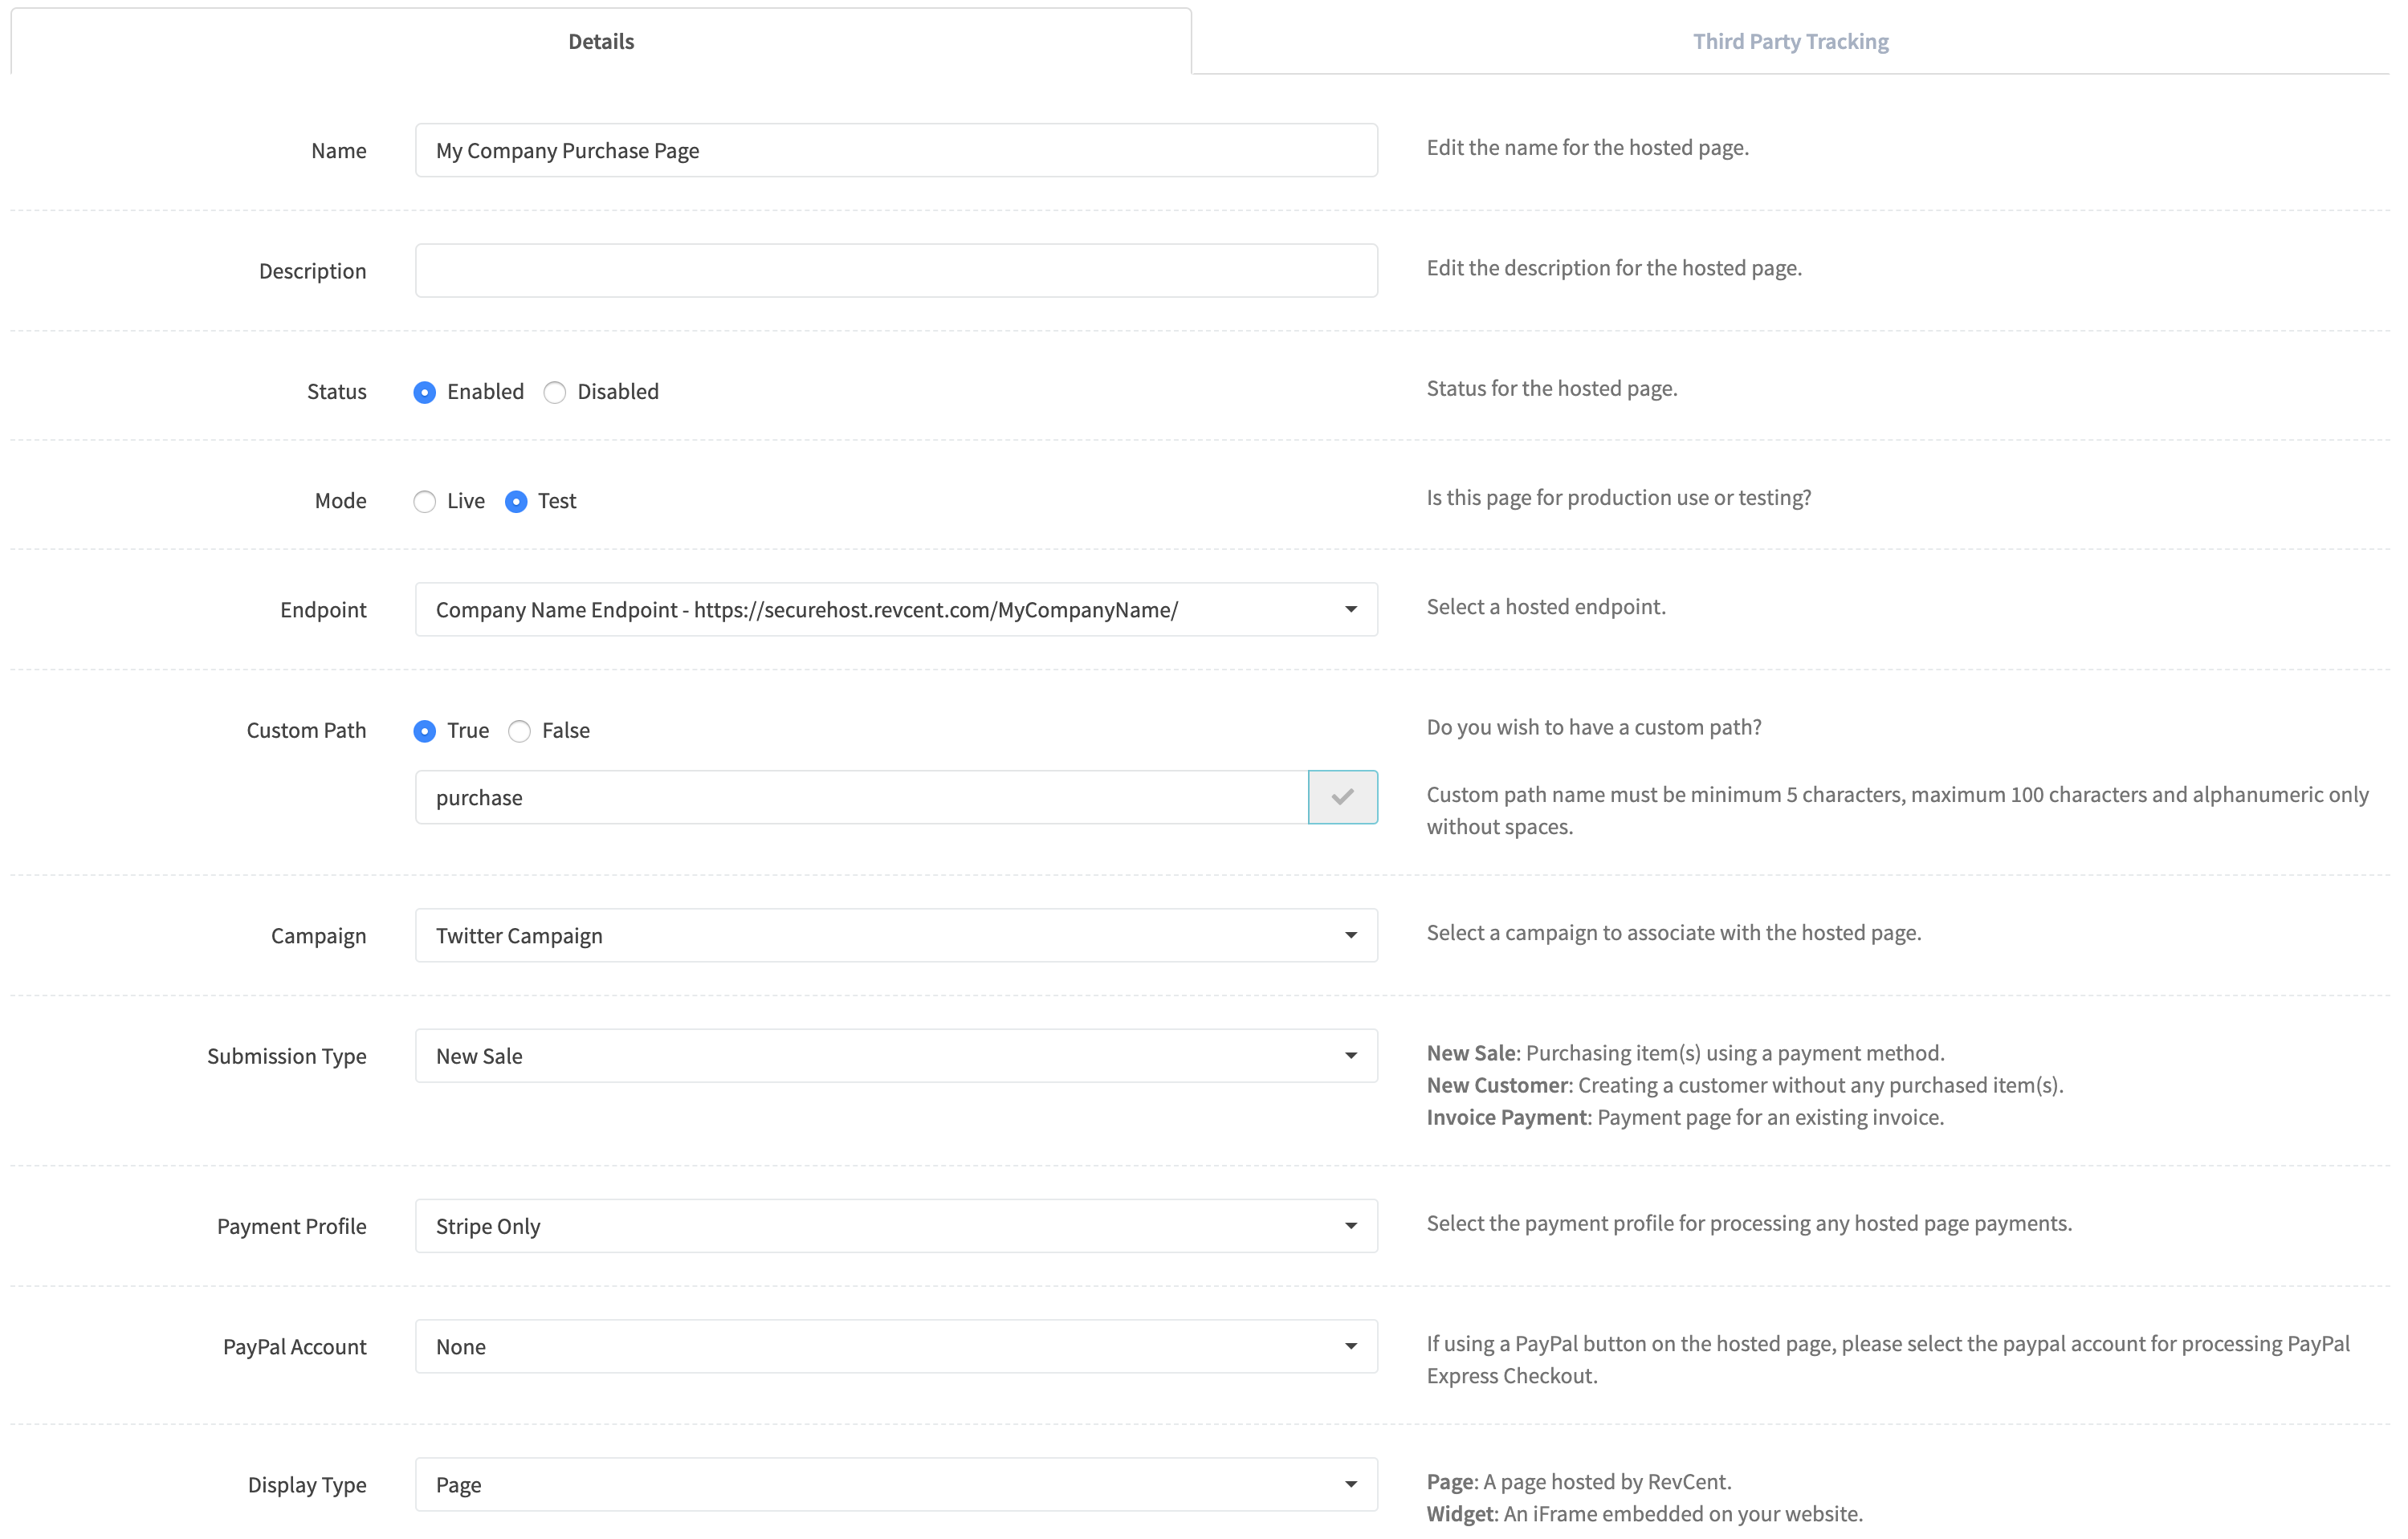
Name
Set a name for the hosted page.
Description
Set a description for the hosted page.
Status
Set the status of the hosted page.
Mode
Set the mode for the hosted page.
Options:
- Live: Will send transactions to your gateway’s live endpoint. Use live mode when you are ready to process real transactions.
- Test: Will send transactions to your gateway’s text/sandbox endpoint. Use test mode when testing your hosted page.
Endpoint
Set the endpoint for the hosted page. This will be the initial URL path preceding the hosted page path. Required.
Custom Path
If you wish to have a custom path for your hosted page, i.e. https://securehost.revcent.com/endpoint_path/my_custom_path. Enter the custom path and click the Check Availability button. If the custom path is not already taken you can use it as your custom page path. RevCent will use the Hosted Page ID if you do not enter a custom path.
Campaign
Select the Campaign to associate with the hosted page. Required.
Submission Type
Set the submission type for the hosted page. Required.
Options:
- New Sale: Purchasing item(s) using a payment method.
- New Customer: Creating a customer without any purchased item(s).
- Invoice Payment: Payment page for an existing invoice.
Payment Profile
Select the Payment Profile for processing any hosted page payments. Required.
PayPal Account
Select the PayPal account for processing PayPal Express Checkout If using a PayPal button on the hosted page.
Display Type
Select the display type for the hosted page.
Options:
- Page: A page hosted by RevCent
- Widget: An iFrame embedded on your website.
Template

Template
Select the Hosted Page Template for the hosted page. This is what will be displayed.
Description
Set a HTML title.
Status
Set a HTML description.
Actions
You can set actions for each result type, i.e. success, decline, etc.
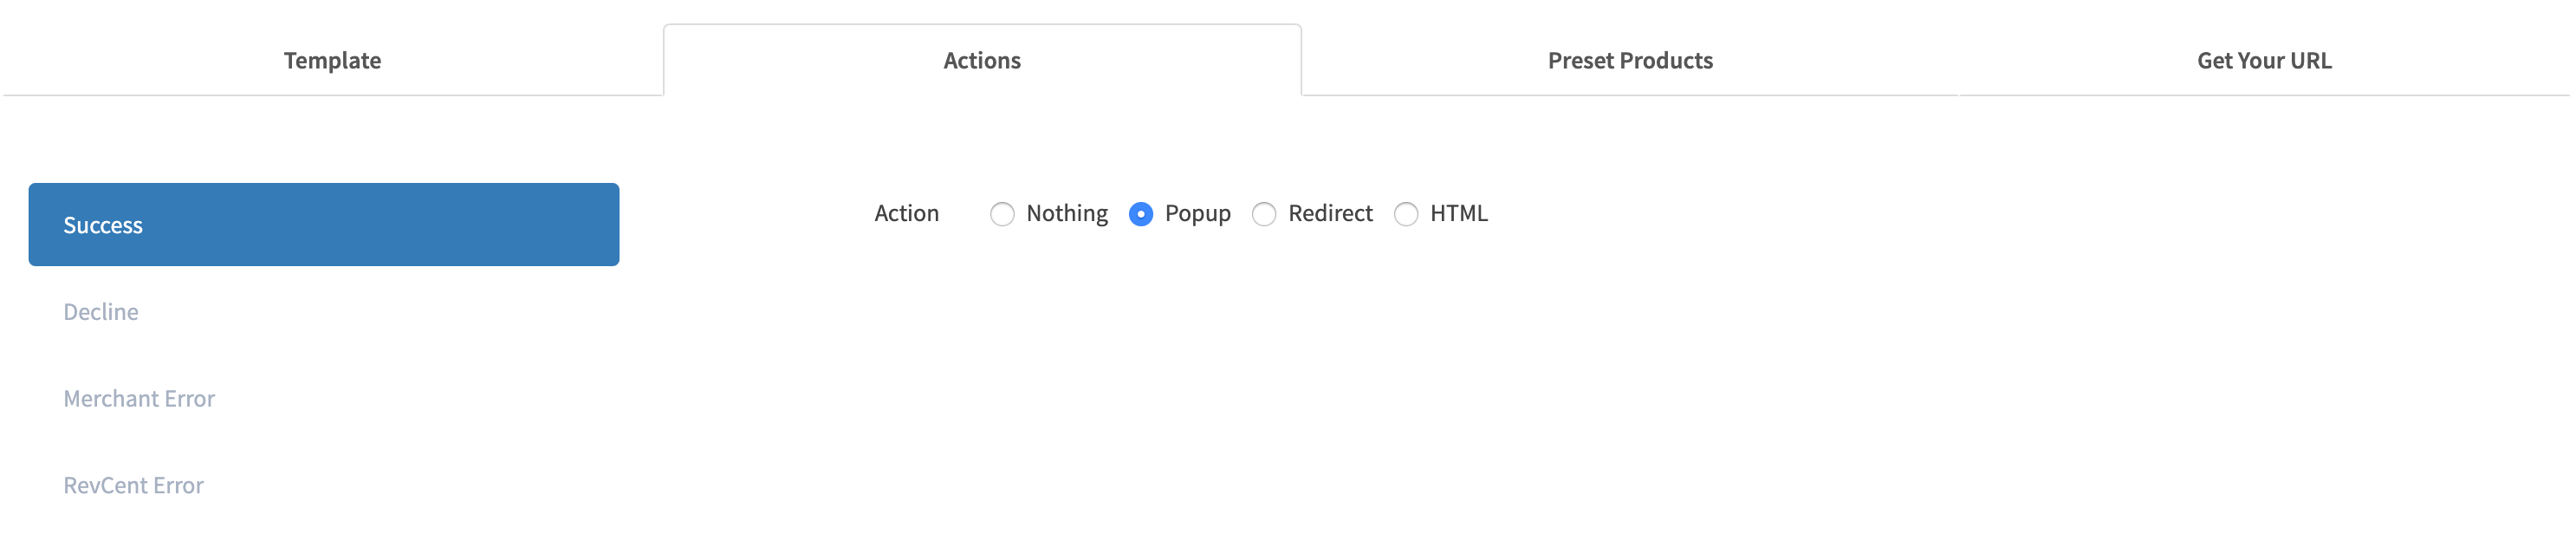
Result Types
- Success: Successful transaction.
- Decline: Transaction was declined by your payment gateway.
- Merchant Error: Your payment gateway returned an error.
- RevCent Error: RevCent returned an error.
Result Actions
- Nothing: Absolutely nothing will be displayed. (not recommended).
- Popup: A simple popup will be displayed showing a generic description of the transaction result.
- Redirect: Specify a redirect URL.
- HTML: Use the built in HTML editor to display a customized a message.
Preset Products
You can set preset product(s) for a hosted page. Preset products ensure that when a user lands on a hosted page, a specific product(s) will already be included in the cart.
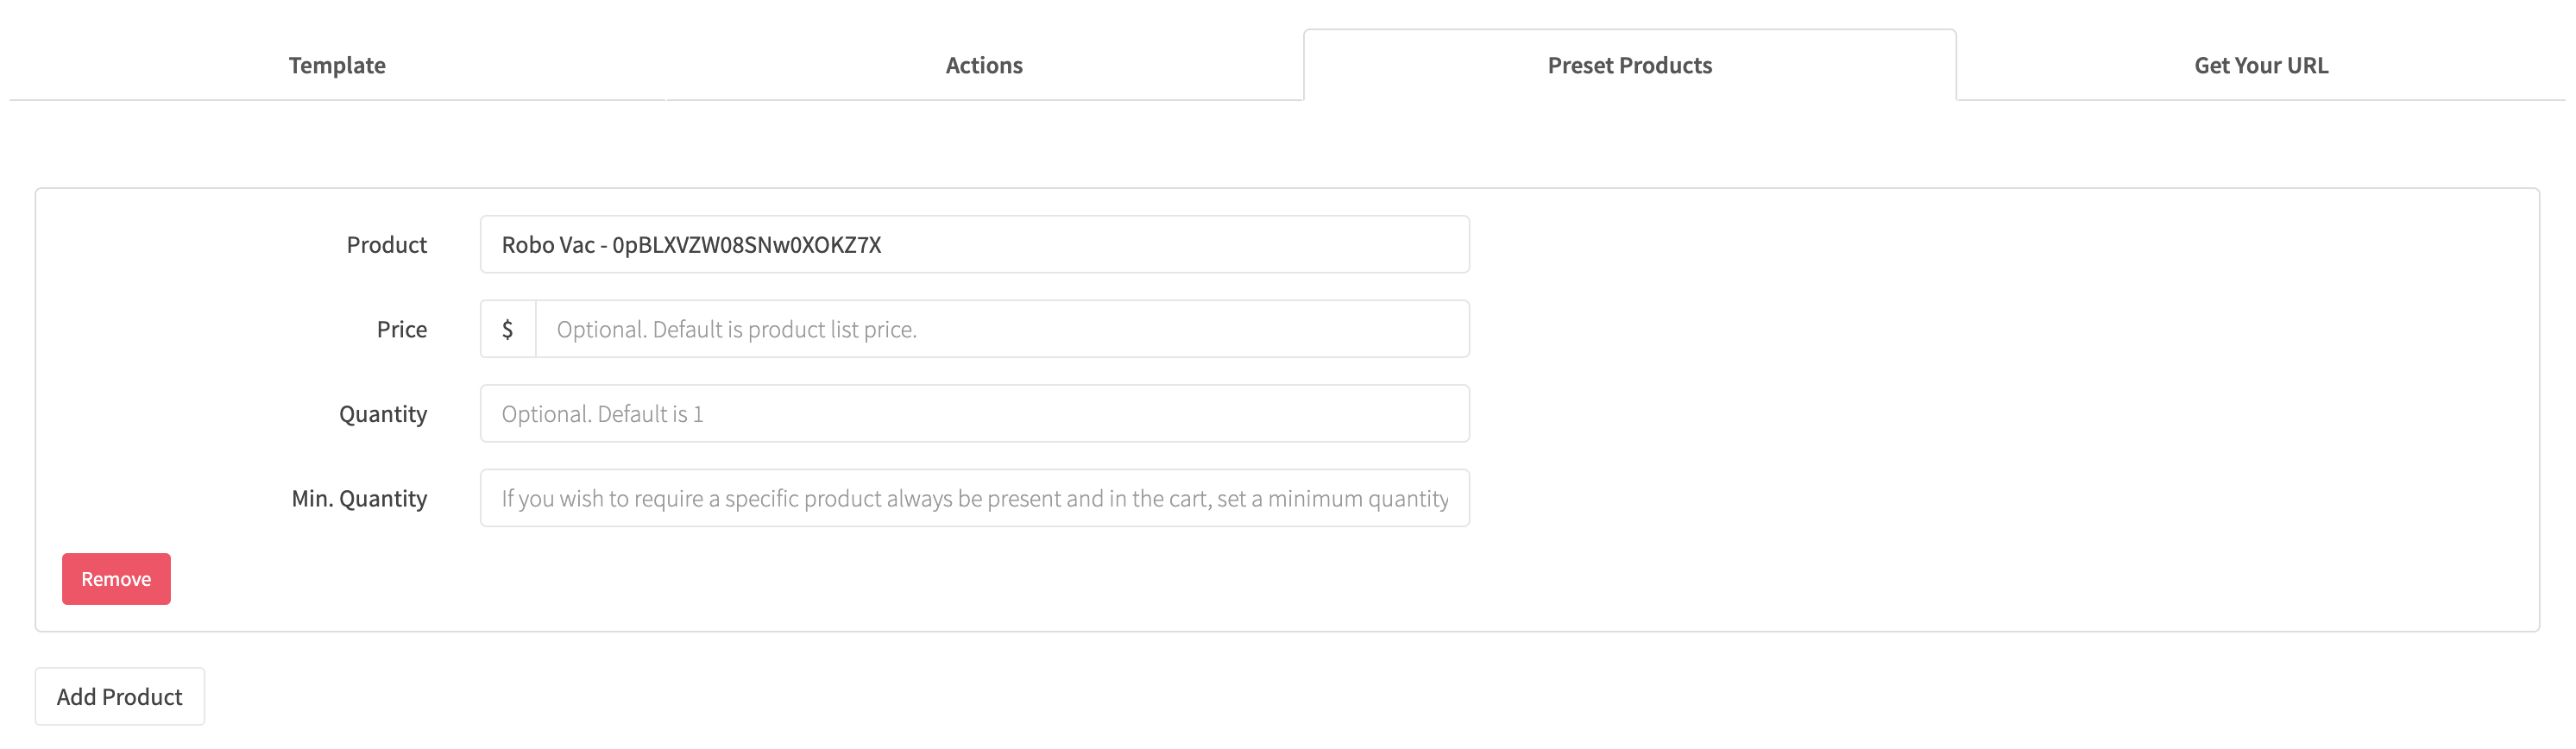
Product
Search the product you wish to add.
Price
If you wish to specify a price for the product, default is product price.
Quantity
If you wish to specify a quantity for the product, default is 1.
Min. Quantity
If you wish to specify a minimum quantity, requiring a product to always be present in the cart.
Third Party Tracking
Enable third party tracking for your hosted pages. Useful for pinging third parties for conversions and metrics. RevCent does not allow embedding javascript into a hosted page, so we offer this solution for third party javascript code. RevCent automatically adds the necessary javascript code to the hosted page, you simply provide the required fields for the third party.
At this time we only support AdWords and Facebook. If you require another third party please do not hesitate to contact us so we can implement it.
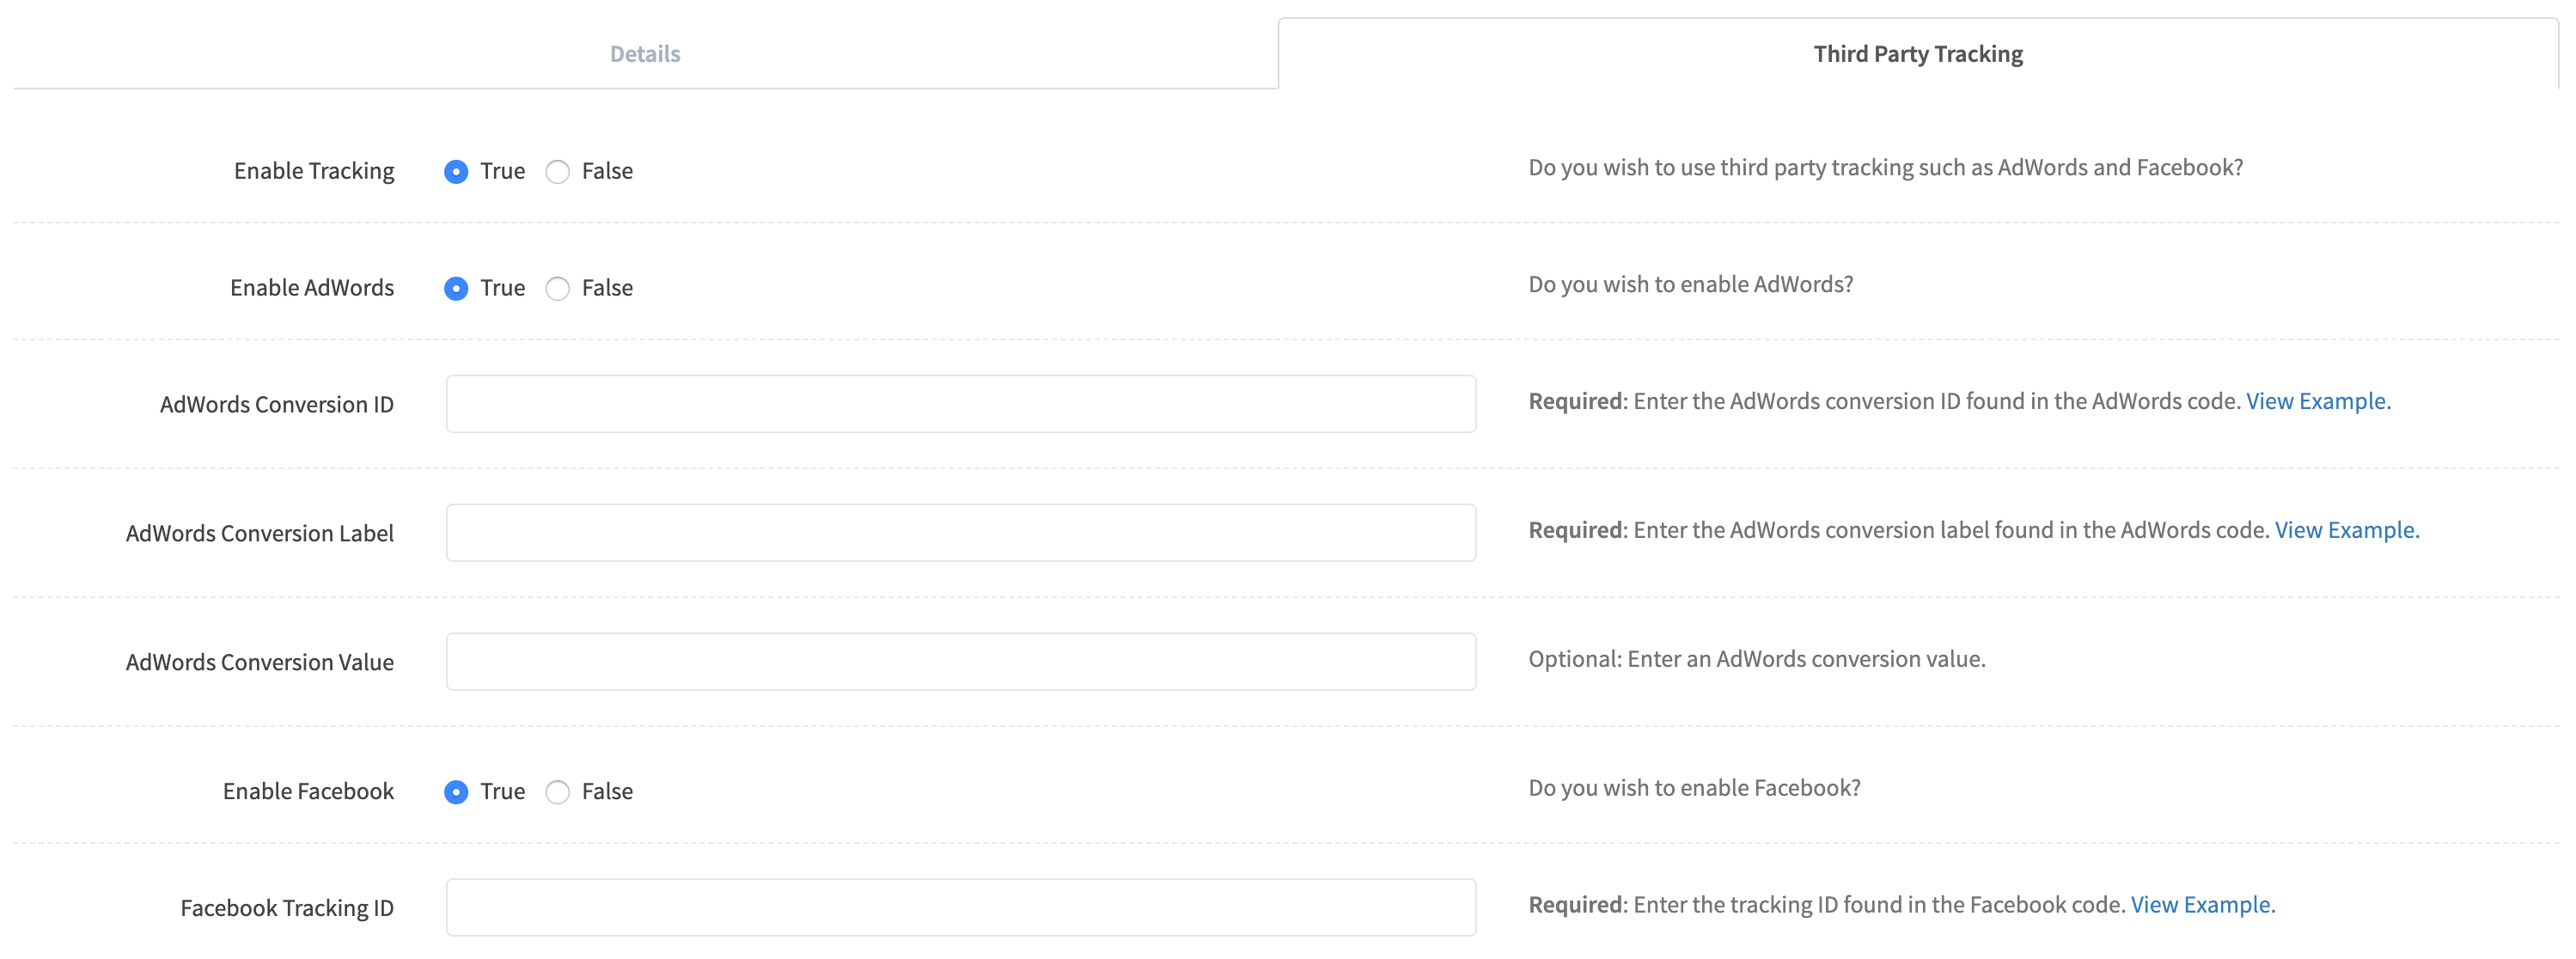
AdWords
If you wish to use AdWords tracking, click True and enter the required fields.
AdWords Fields:
- Conversion ID: Enter the AdWords conversion ID. Required.
- Conversion Label: Enter the AdWords conversion label. Required.
- Conversion Value: Enter an AdWords conversion value. Optional.
If you wish to use Facebook tracking, click True and enter the required field.
Facebook Fields:
- Tracking ID: Enter the Facebook tracking ID. Required.