RevCent Track.js
Overview and details on RevCent's custom domain tracking.
All RevCent users have access to our in house tracking system, called Track.js. By inserting javascript code onto each of your websites, you can track visitors across multiple domains until they ultimately make a purchase. Track.js is essential for tracking conversions in RevCent as well as providing more information for Fraud Detections.
We highly recommend you read about the enhanced conversion tracking capabilities RevCent offers on our Conversion Tracking page.
Important: Only domains that you have added to your Tracking Domains, with DNS successfully completed, will have tracking enabled. RevCent does not blindly track across the internet, we must know that the domain being tracked is from a specific RevCent user. Make sure you have Create A Tracking Domain and successfully set up DNS tracking before installing the tracking snippet.
Why Use Track.js?
- Track.js enables you to track from initial visit to final purchase for visitors across all of your domains.
- Attach any type of metadata to a visitor and have it persist even after a purchase is made.
- Regardless of acquisition channel, you can accurately track conversions using Track.js custom url parameters.
- Provides more information for Fraud Detections, enabling future prevention.
View Tracking Domains
View your tracking domains by clicking Tracking > Domain > Domains in the sidebar, or go to https://revcent.com/user/tracking-domains.

Create A Tracking Domain
Create a new tracking domain by clicking New domain when viewing all tracking domains or go to https://revcent.com/user/new-tracking-domain. Enter its details, then click Create domain.
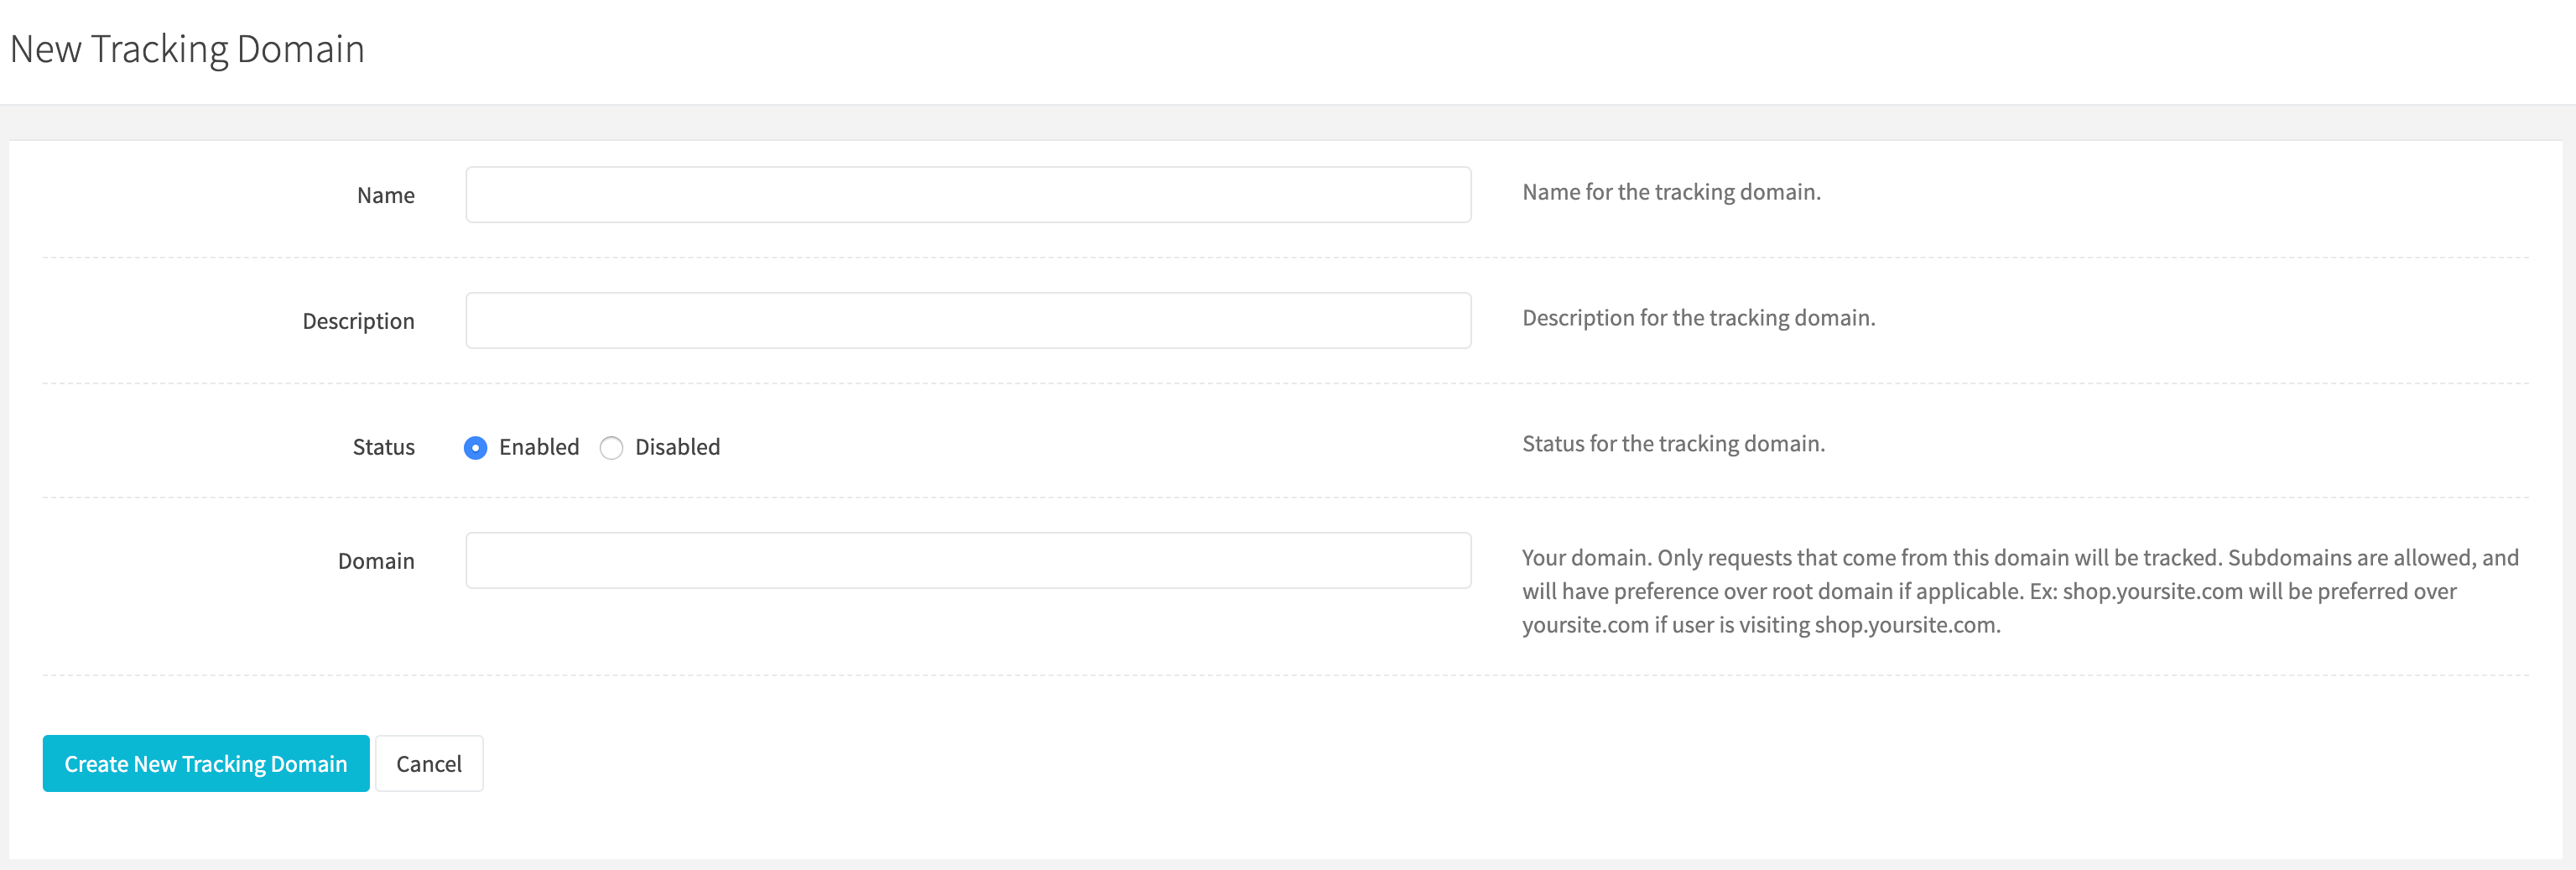
Name
Enter a name for the tracking domain.
Description
Enter a description for the tracking domain.
Status
Set the status for the tracking domain.
Domain
Enter your domain. Only requests that come from this domain will be tracked.
Once the tracking domain is created you will be forwarded to the Edit Tracking Domain page for the new tracking domain.
Edit A Tracking Domain
Edit an existing tracking domain by clicking the edit icon when viewing all tracking domains. If you have not successfully set up DNS, please do so.
Details
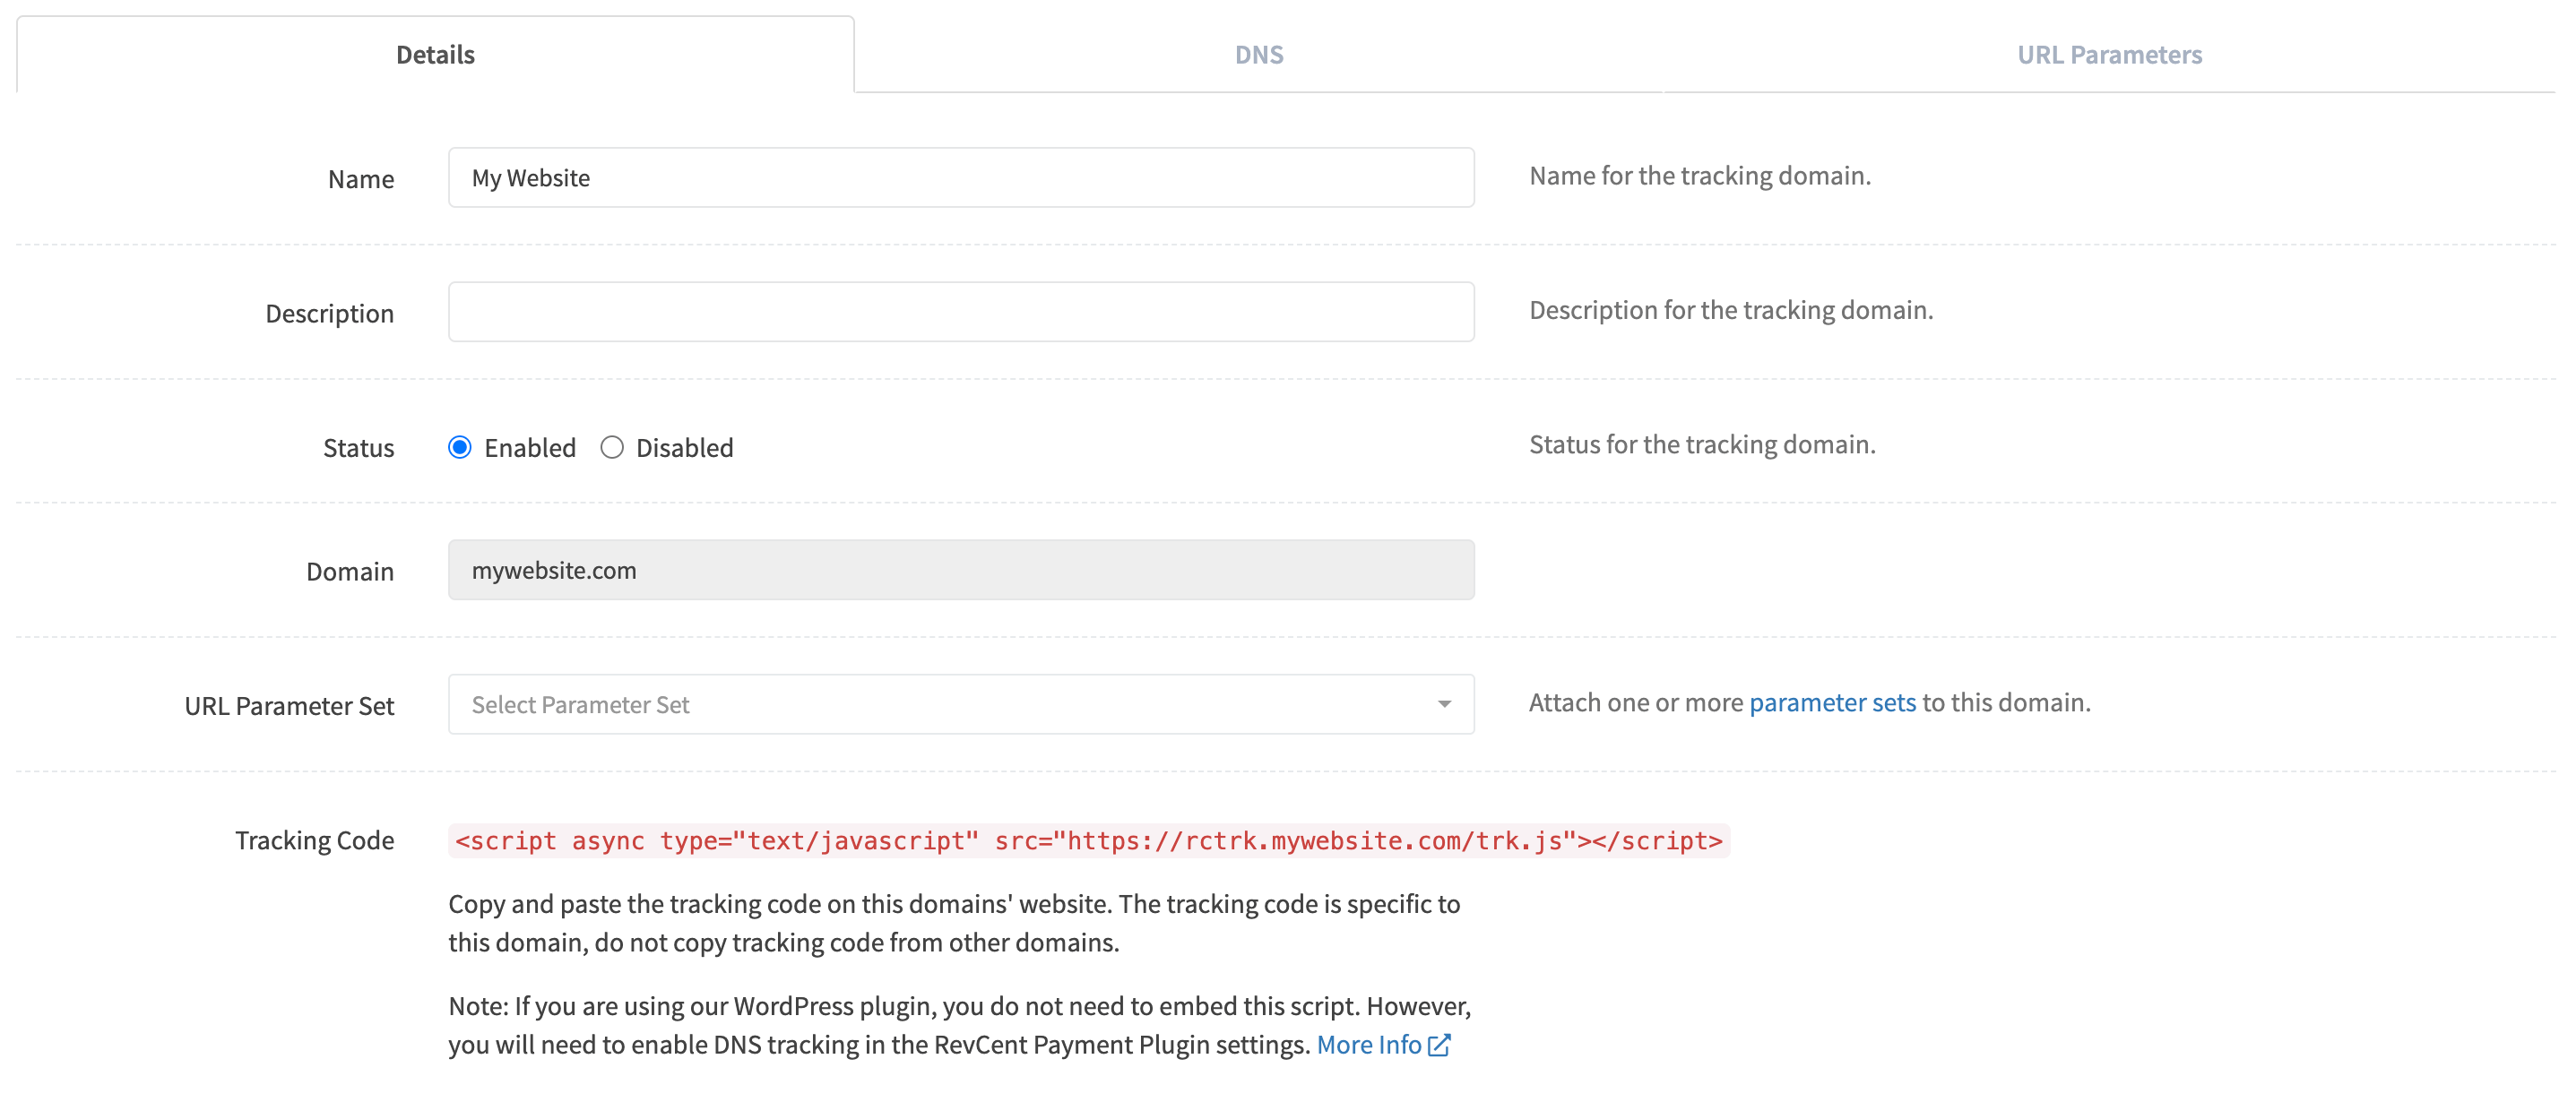
Name
Enter a name for the tracking domain.
Description
Enter a description for the tracking domain.
Status
Set the status for the tracking domain.
URL Parameter Set
Attach one or more URL parameter sets to this domain.
Tracking Code
Open DNS & SSL and copy the tracking code from Install tracking code after setup is complete. The code is specific to the domain being modified; do not copy tracking code from other domains.
Note: If you are using our WordPress plugin, you do not need to embed this script. However, you will need to enable DNS tracking in the RevCent Payment Plugin settings. More Info
DNS
Required. In order to for RevCent to track visitors, you must set up DNS for each domain you wish to track.
Browsers have begun preventing third party cookies for tracking as well as cross domain cookie usage. This is going to be the standard moving forward, so first party cookies are needed for accurate tracking capabilities. First party cookies are cookies set by the domain the visitor is visiting. By correctly setting up DNS for your tracking domain, you allow RevCent to set first party cookies when embedding the tracking script on a domain.
Please follow the steps below to successfully enable DNS and first party cookies in RevCent.
Things to Note:
- There is an additional $1 monthly charge in RevCent for each tracking domain that has DNS enabled.
- Configure every subdomain shown in your domain’s DNS & SSL panel. The tracking certificate does not replace the certificate for your main website.
- You need to be logged into RevCent and editing the specific domain you want to add DNS tracking to. The DNS settings are specific to each of your tracking domains in RevCent.
- Use the values provided in your specific tracking domain’s DNS & SSL tab in RevCent, not the example values below. The certificate and completion screenshots show an already configured example domain.
Open DNS & SSL
Open the tracking domain’s DNS & SSL tab. The current setup panel shows four steps: add A records, validate the SSL certificate, finalize DNS integration, and install tracking code.
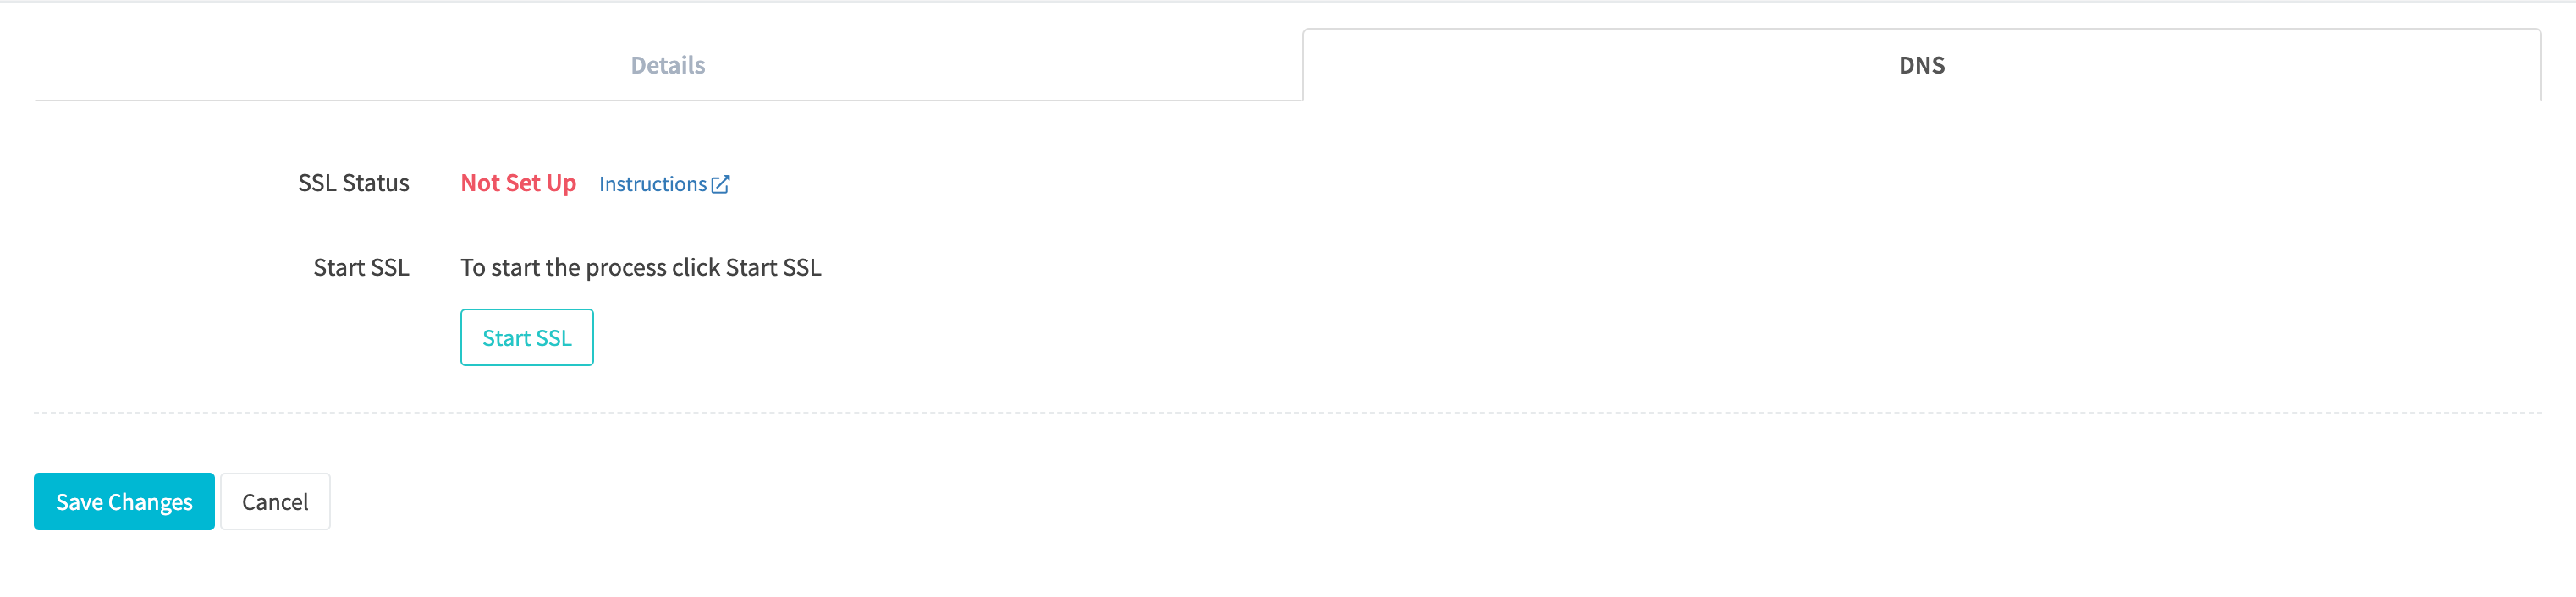
- Make sure you are logged into RevCent and editing the tracking domain you wish to set DNS for.
- Click DNS & SSL to view the required A records.
- Proceed to the A-record setup below. The former Start SSL action is now part of Verify A records and initialize SSL.
Step 1: Add A Records
You will first need to create A records in your domains’ DNS settings. You will set A records for each of the subdomains listed, using the IP addresses provided when editing your tracking domain.
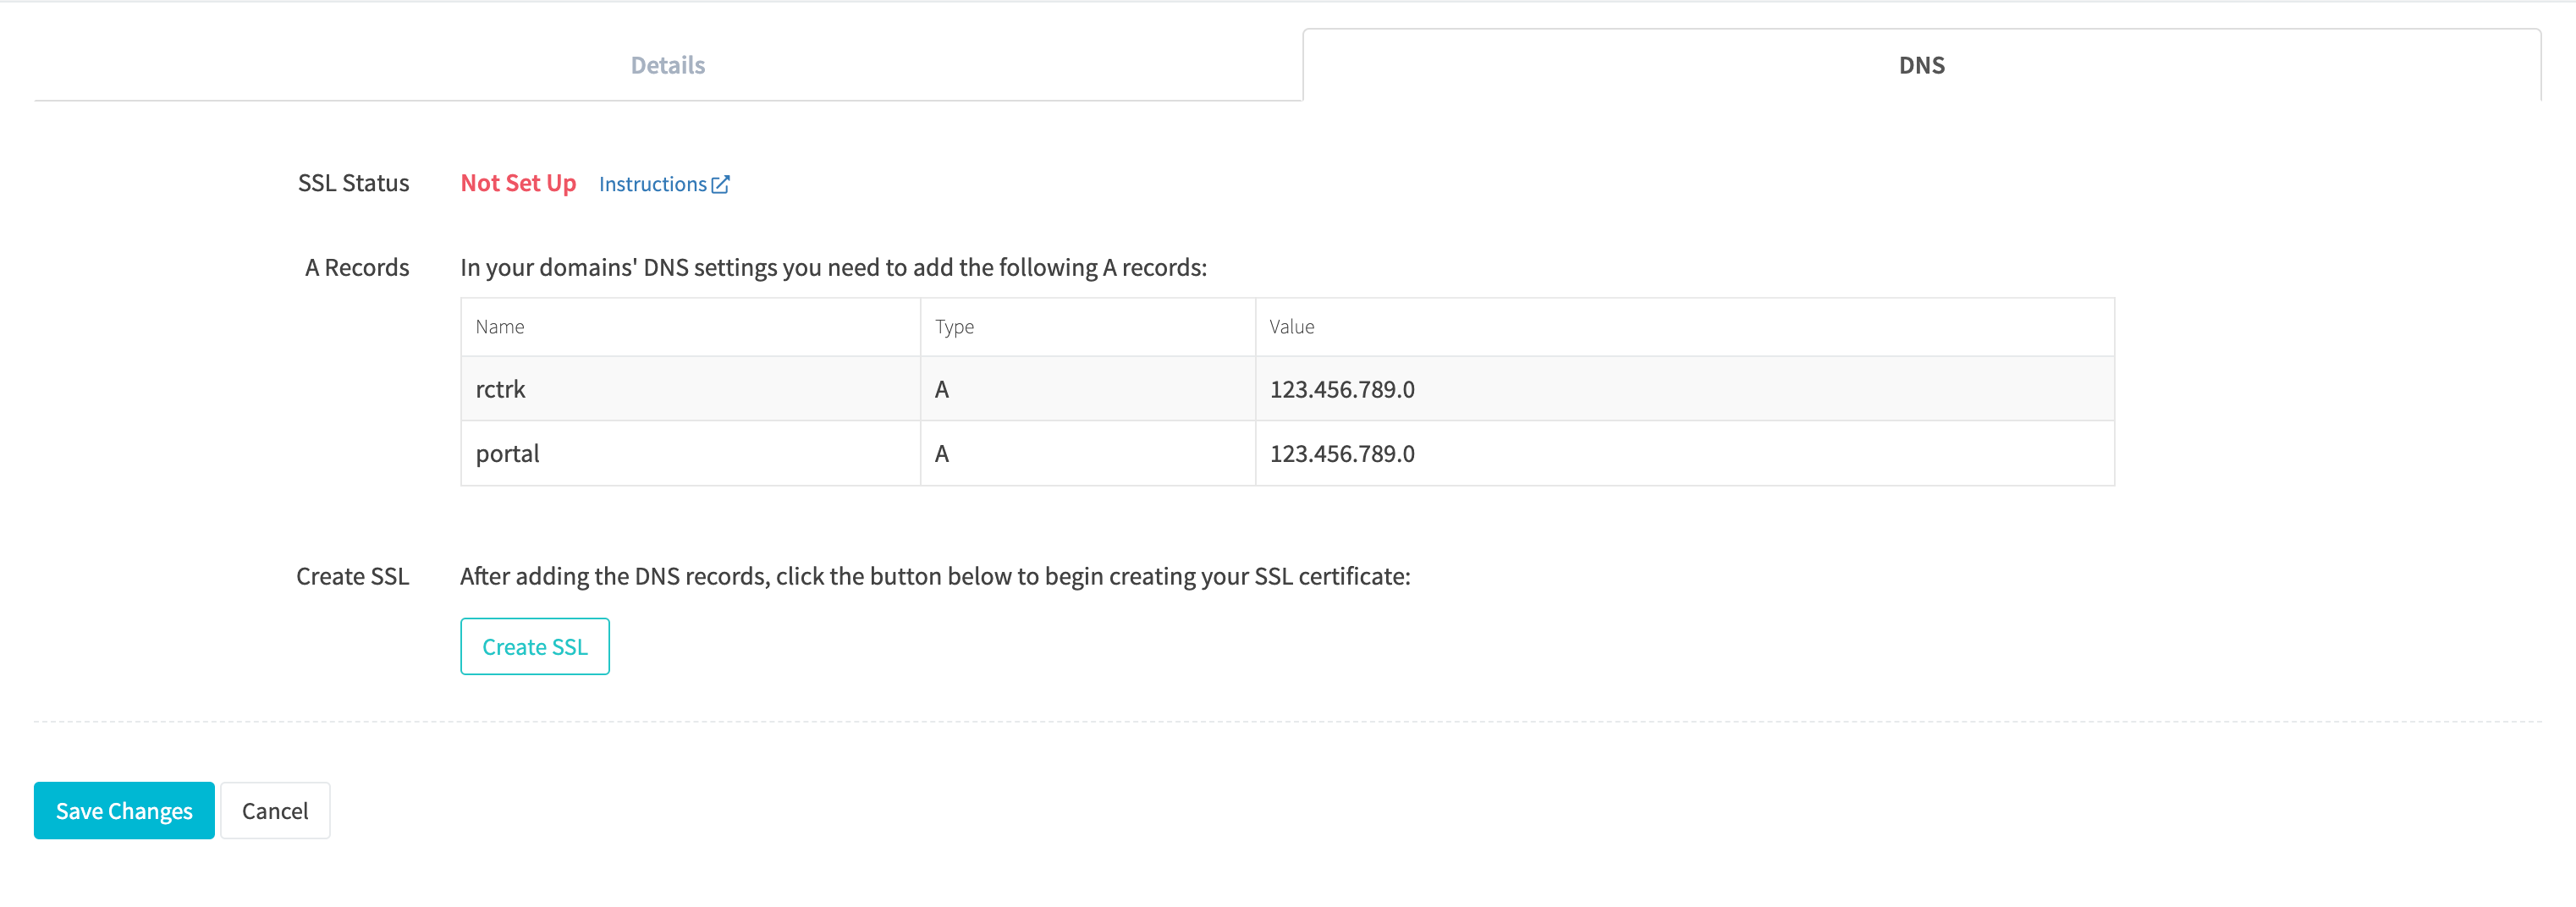
- Make sure you are logged into RevCent and editing the tracking domain you wish to set DNS for.
- Open DNS & SSL and locate Add A records.
- In a separate browser window/tab, go to your domains’ DNS settings where you registered your domain.
- Add A records for each of the names listed in the table to your domain registrars’ DNS settings. Make sure the DNS entry type is ‘A’, the name matches the name for each entry and that the value is the IP address for each.
- After adding every A record, click Verify A records and initialize SSL. DNS propagation can take time; if verification fails, confirm the records and try again after they have propagated.
- Once the SSL has been created, the page will refresh and you will begin the status check. Stay in your domain registrars’ DNS settings.
- Proceed to the CNAME Record step below.
Step 2: Validate SSL Certificate
The status check is necessary in order to validate that you are the owner of the domain the SSL certificate was requested for. Validation is done using a specific CNAME record added to your domain registrars’ DNS settings. Once you add this CNAME record, your SSL certificate will also be auto renewed each year.
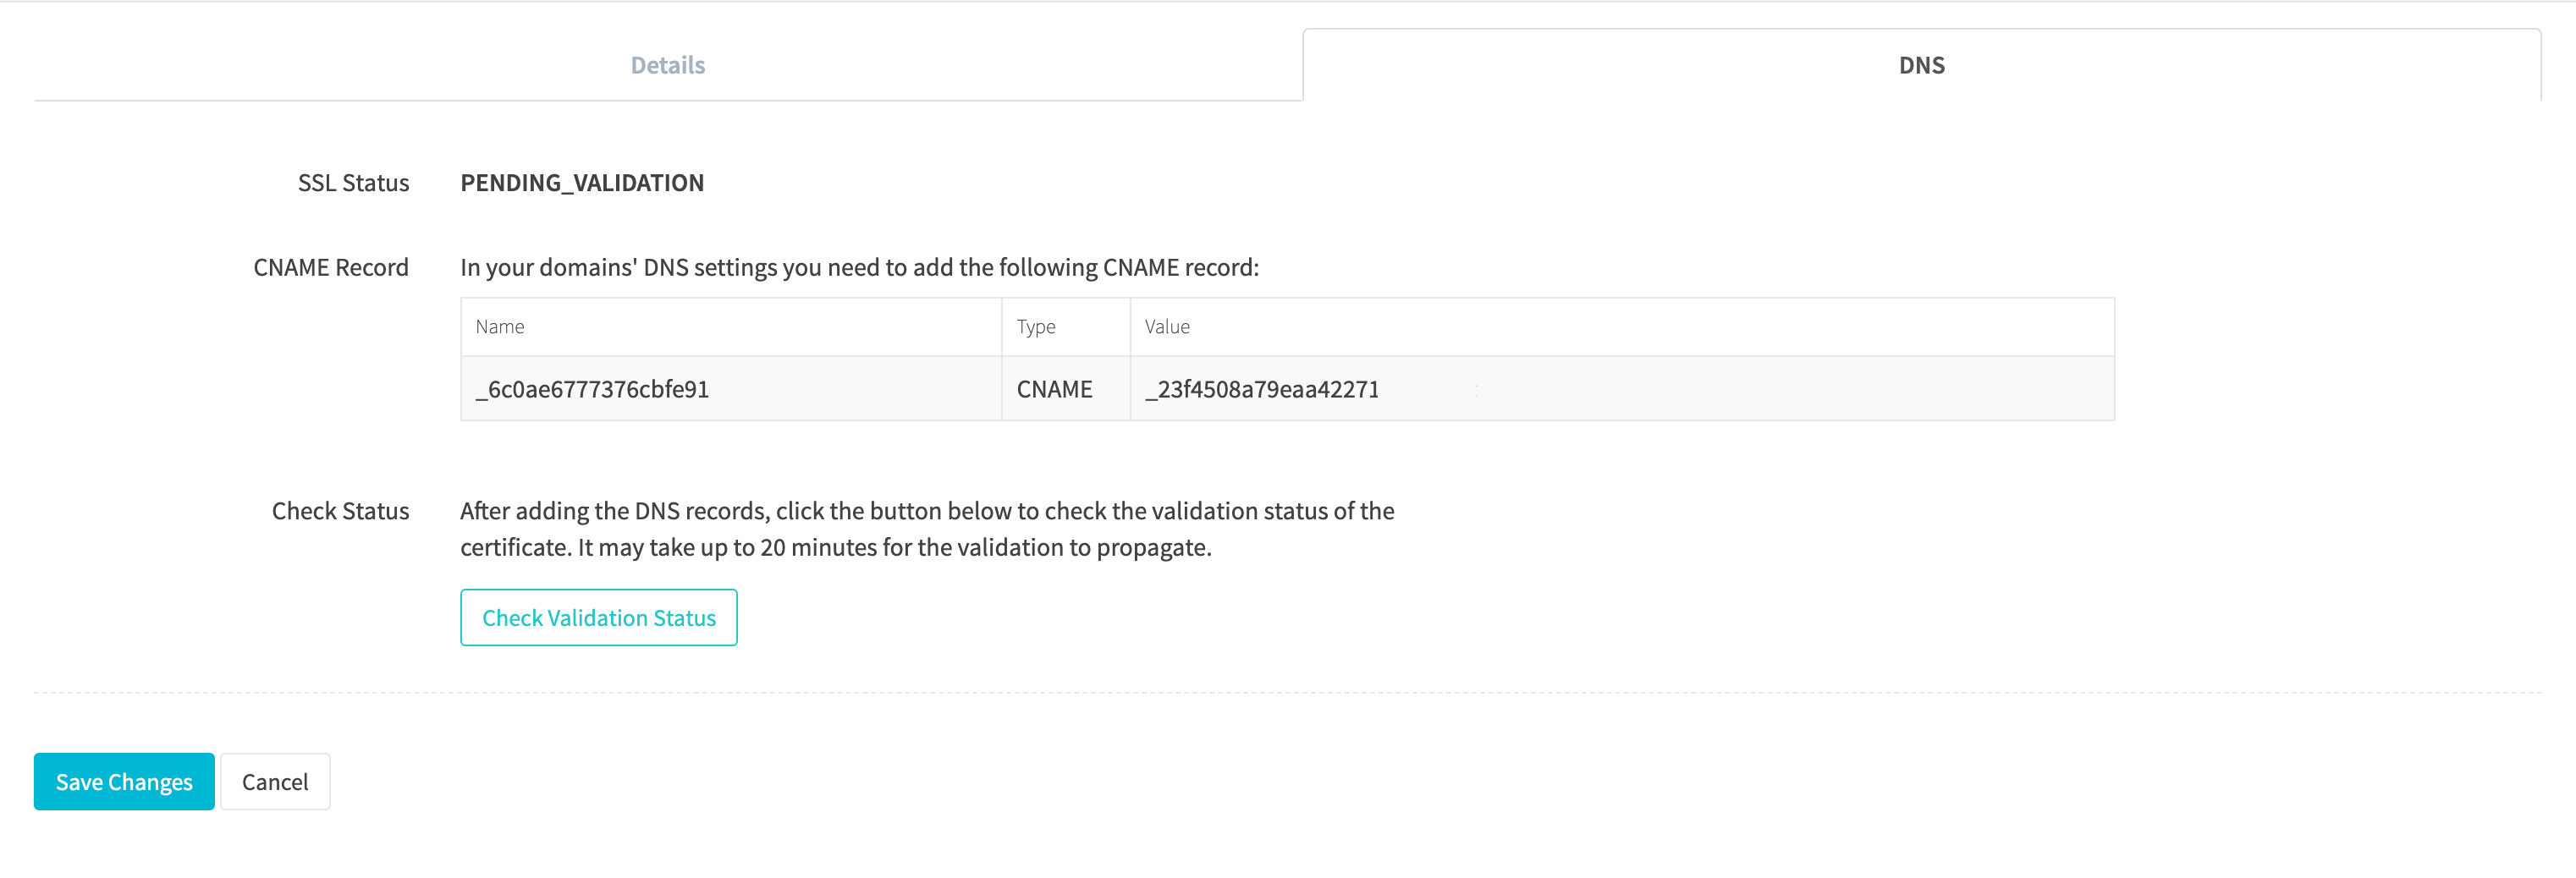
- Make sure you are logged into RevCent and editing the tracking domain you wish to set DNS for.
- Open DNS & SSL and locate Validate SSL certificate.
- Go to your domains’ DNS settings where you registered your domain.
- Add the CNAME record using the values provided in the table to your domain registrars’ DNS settings. This is required in order to officially issue the SSL certificate.
- After adding the CNAME record, click Check SSL status while validation is pending. DNS propagation and certificate issuance can take several minutes.
- Once the Validation is successful, the page will refresh and you will begin the DNS finalization.
- Proceed to the Finalize DNS step below.
Step 3: Finalize DNS
Now that the SSL certificate has been created and verified, it is time to finalize the DNS integration.
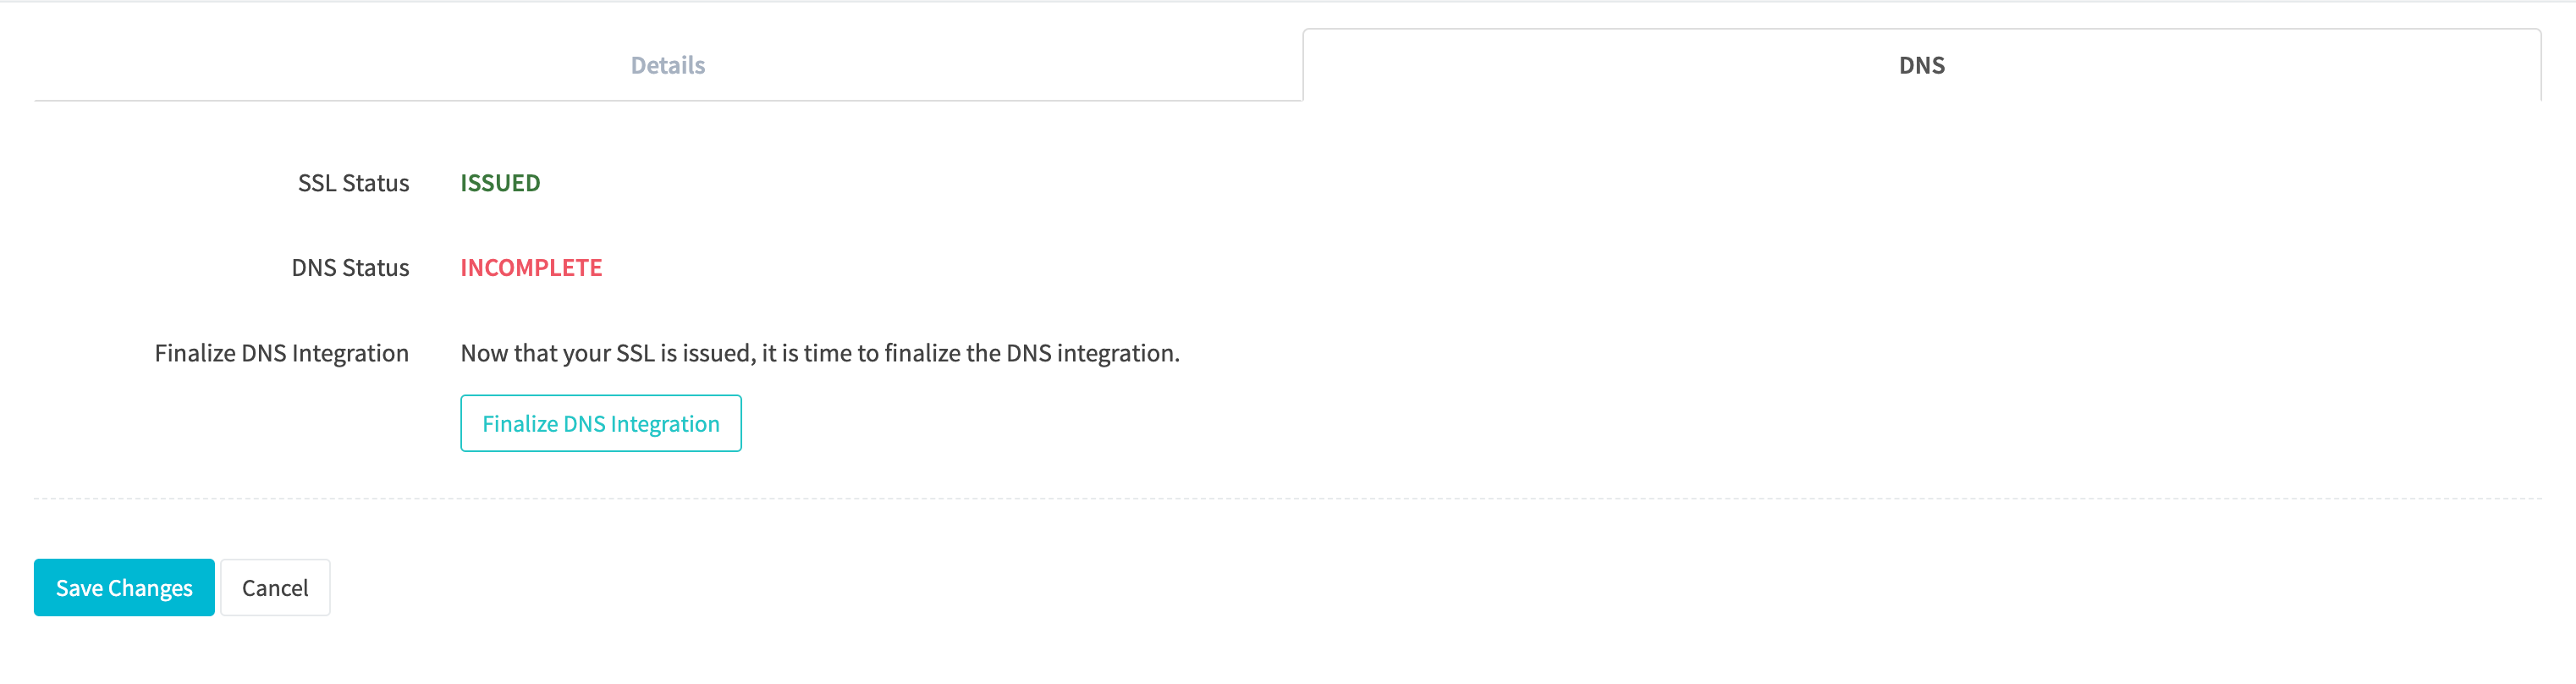
- Click Verify DNS and finalize setup.
- Once the DNS finalization is successful, the page will refresh.
- Proceed to the DNS Complete section below.
DNS Complete
In step 4, Install tracking code, copy the snippet for your domain and embed it in your website. If you use the WordPress plugin, enable DNS tracking in the RevCent Payment Plugin settings instead.
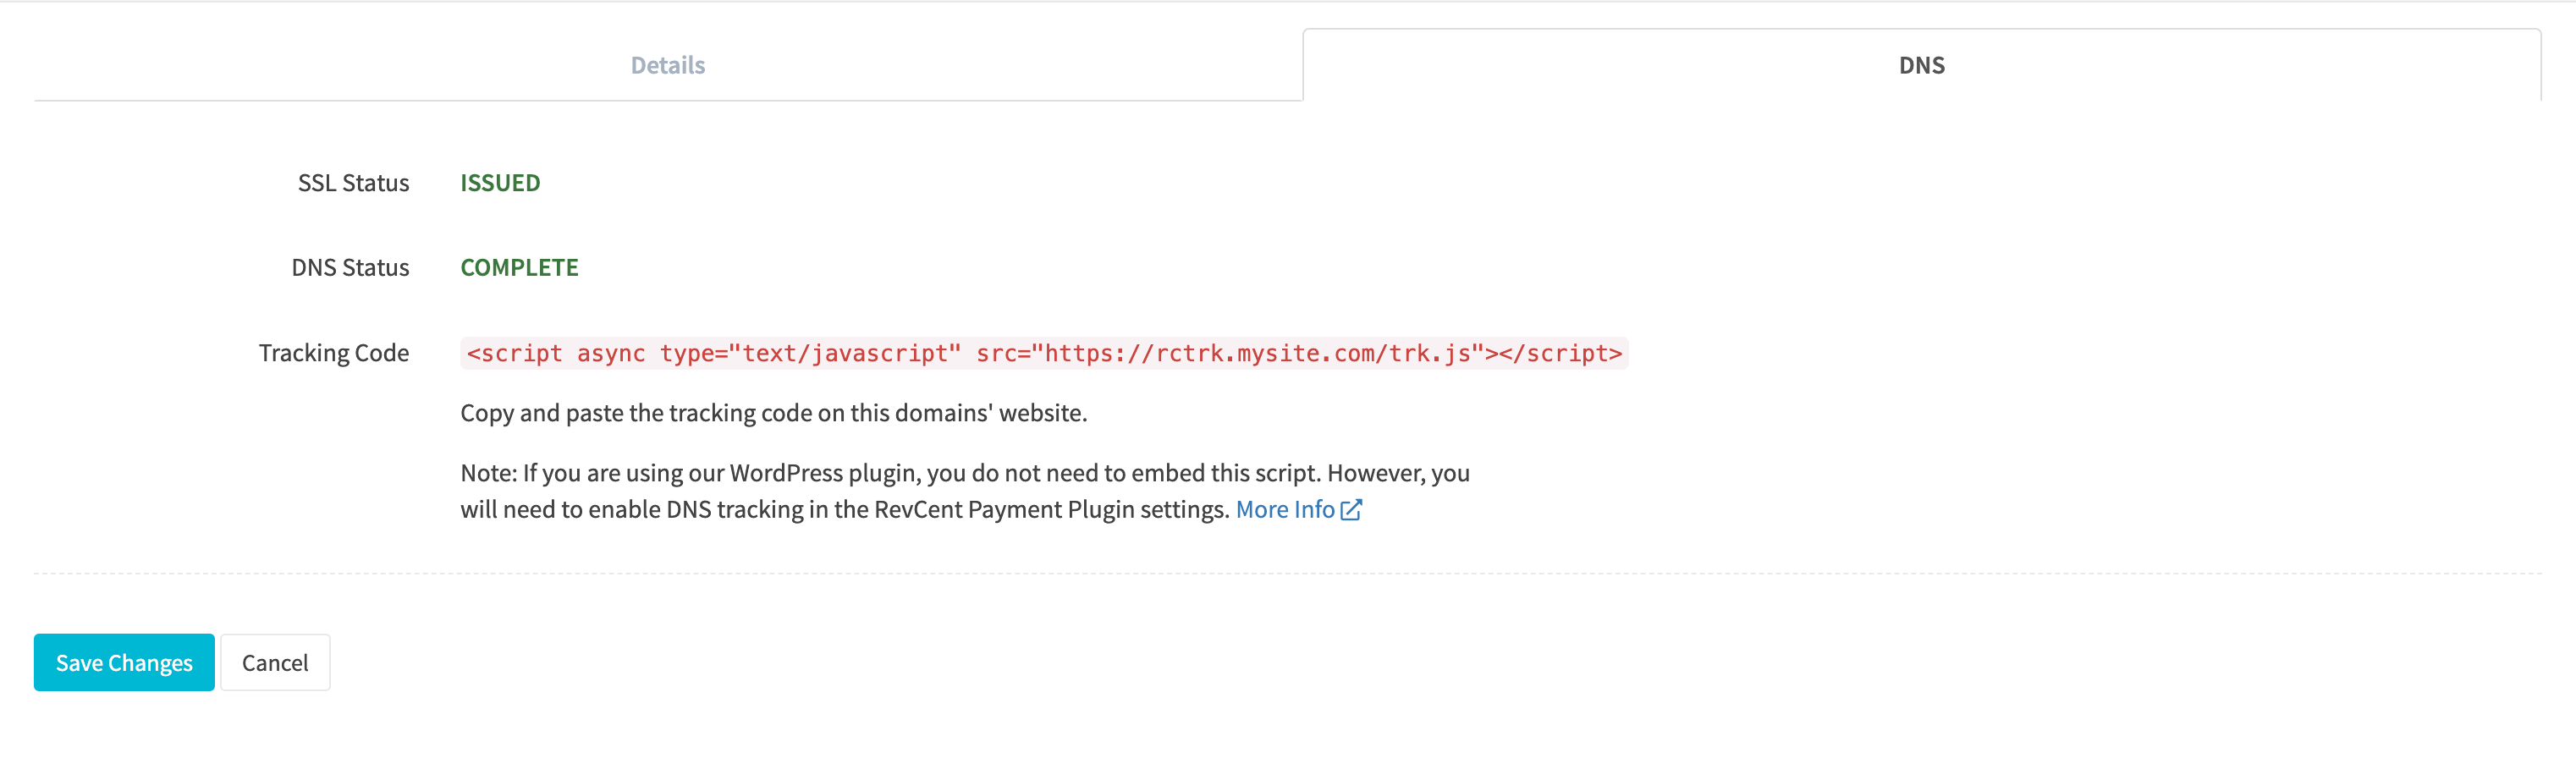
If you are not using WordPress, copy the Tracking Code and paste it before the closing body tag of each page for the respective tracking domain. Proceed to the instructions on Providing RevCent The Visitor ID.
If you are using WordPress, the Tracking Code is already embedded on your site. However, you will need to enable DNS tracking in the RevCent plugin.
Provide RevCent the Visitor ID
Note: This is for non-WordPress users. If you are using WordPress you can ignore this section.
In order for RevCent to know what sale came from a specific visitor that was tracked, RevCent must match the tracking visitor ID to each payment request when sent. This is done using the metadata array in an API payment request. Before submitting a payment request, find the rctrk.your-domain.com cookies, specifically the revcent_track_id and revcent_entry_id cookies with respective values.
In the API payment request, include the two name/value pairs within the metadata array. This will create the visitor to sale relationship, thus allowing any URL parameters to be attached to a sale.
Example API call:
"type": "sale",
"method": "create",
"metadata": [
  {
    "name": "revcent_entry_id",
    "value": "COOKIE_VALUE" // rctrk.your-domain.com > revcent_entry_id cookie value
  },
  {
    "name": "revcent_track_id",
    "value": "COOKIE_VALUE" // rctrk.your-domain.com > revcent_track_id cookie value
  }
],
....
WordPress Plugin DNS Setting
For RevCent users who are using WooCommerce and the RevCent payments plugin, it is important to enable DNS tracking in the RevCent Payment plugin settings. This ensures that the tracking code for your WordPress site is the correct code for DNS enabled tracking domains.
Important: Only follow these instructions after you have successfully set up DNS for the tracking domain that is the same domain as the WordPress site.
Step 1: Plugins

- Login to your WordPress site that is the same domain as the tracking domain you have DNS successfully set up for.
- Go to your WordPress plugins page.
- Find the RevCent payment plugin. If you need to update the plugin, do so now.
- Make sure the RevCent Payments plugin version is at least 1.6.0.
- Click “Settings” for RevCent Payments.
Step 2: RevCent Payments

- After clicking settings on the plugins page, you will be forwarded to the WooCommerce payments page.
- Find RevCent Payments and click the Manage button.
Step 3: Enable DNS Tracking

- After clicking the manage button on the WooCommerce payments page for RevCent Payments, you will see the plugins’ settings.
- Find the DNS Tracking setting.
- Enable DNS tracking by clicking the checkbox.
- Click Save changes.