¶ Auto Query
An Auto Query in RevCent allow you to conduct a dashboard query automatically during a specific frequency. Set targets and optional qualifiers to get notified of the query results.
¶ Why Use An Auto Query?
- Run existing dashboard queries against your data automatically, and receive results.
- Send query results as CSV files using Email Templates.
- Process query results and run code using Functions, allowing you to conduct virtually any action you want.
- Use query results as the trigger for an AI Assistant.
- Save the query results to a Key Value for access across tools.
- Get notified of important metrics in your account via email or any other means such as Slack, SMS, Telegram, etc.
¶ View Auto Queries
View your auto queries by clicking Tools > Auto Query in the sidebar, or go to https://revcent.com/user/auto-queries

¶ Create/Edit An Auto Query
To create an auto query you must do so in your dashboard.
- Go to your dashboard.
- Choose the panel you wish to auto query.
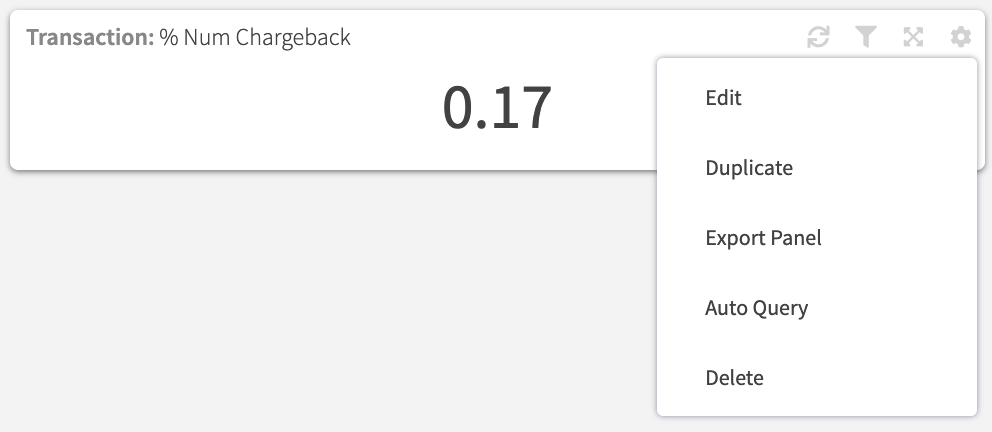
- Click the settings button at the top right corner of the panel.
- Select Auto Query in the dropdown.
¶ Dashboard Panel
Click Auto Query in the panel dropdown and the Auto Query Modal will appear.
¶ Auto Query Dates
Due to the fact that an auto query is meant to be run indefinitely, it is extremely important to set your dashboard panels' date range to a preset range. You do not want an auto query to continuously query the same dates regardless of when the query is actually run.
¶ Preset Date Ranges
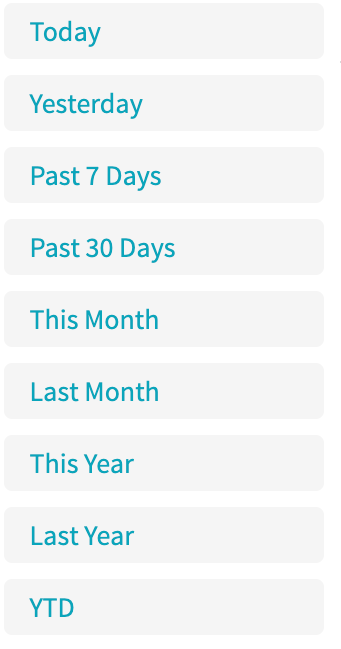
In order to ensure that the queries being run are relative to the date they are run, we highly recommend that you use the preset date ranges when choosing a tab/panel date. If you do not pick a preset date, then the query dates will be fixed to the custom range you chose.
When picking a date range, you will notice the preset ranges on the left side of the date picker.
¶ Preset Date Example
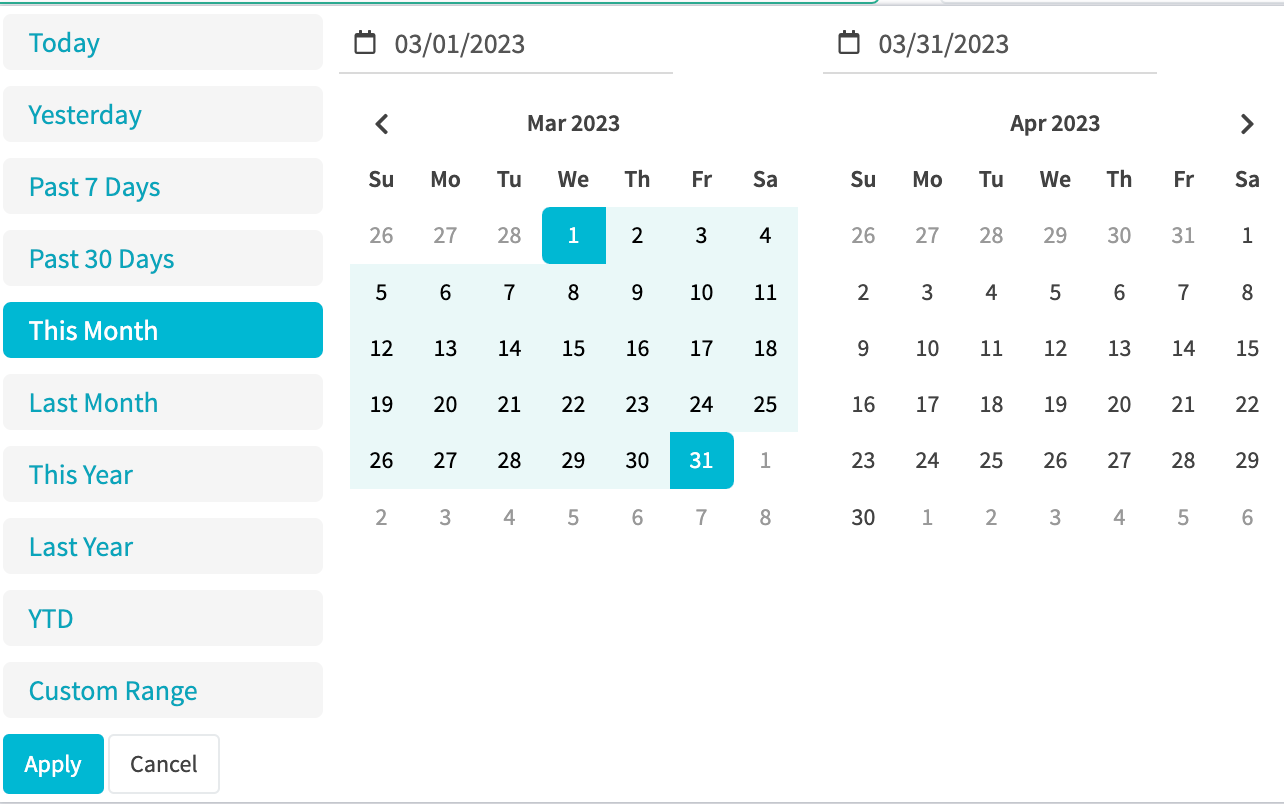
Recommended
In the example below, the preset date range of This Month has been selected. This ensures that the auto query is using the dates relative to the date the auto query is run. For instance, if the month the auto query is run is August 2024 and the date range is This Month, then the auto query will use the start and end dates for August 2024. If the auto query is run during September 2025, it will use the start and end dates for September 2025, and so on.
¶ Custom Date Example
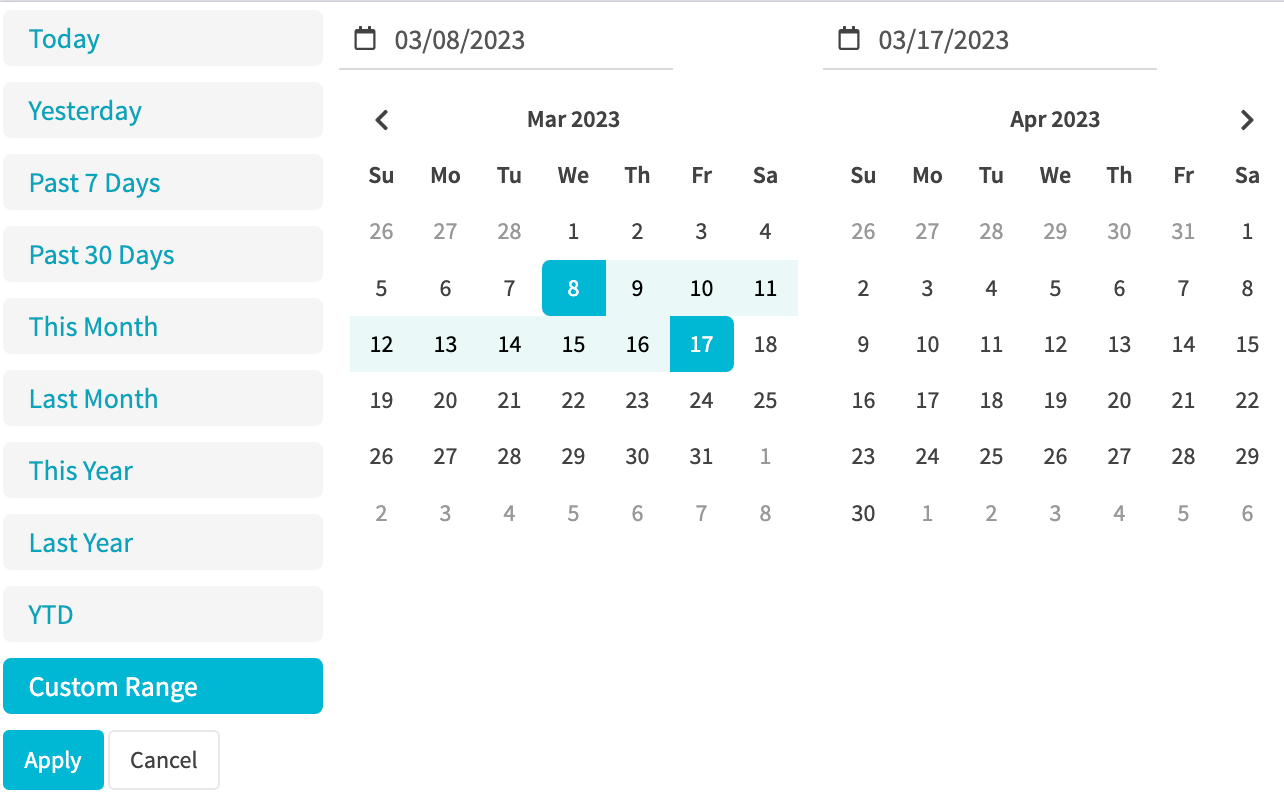
Not recommended
In the example below, a custom date range of 03/08/2023 to 03/17/2023 has been selected. This means that regardless of when the query is run, it will always use the 03/08/2023 to 03/17/2023 custom date range. For instance, if the auto query is run in September 2025, the date range of 03/08/2023 to 03/17/2023 will still be used. This is why it is not recommended to use custom date ranges, and instead use preset date ranges.
¶ Auto Query Modal
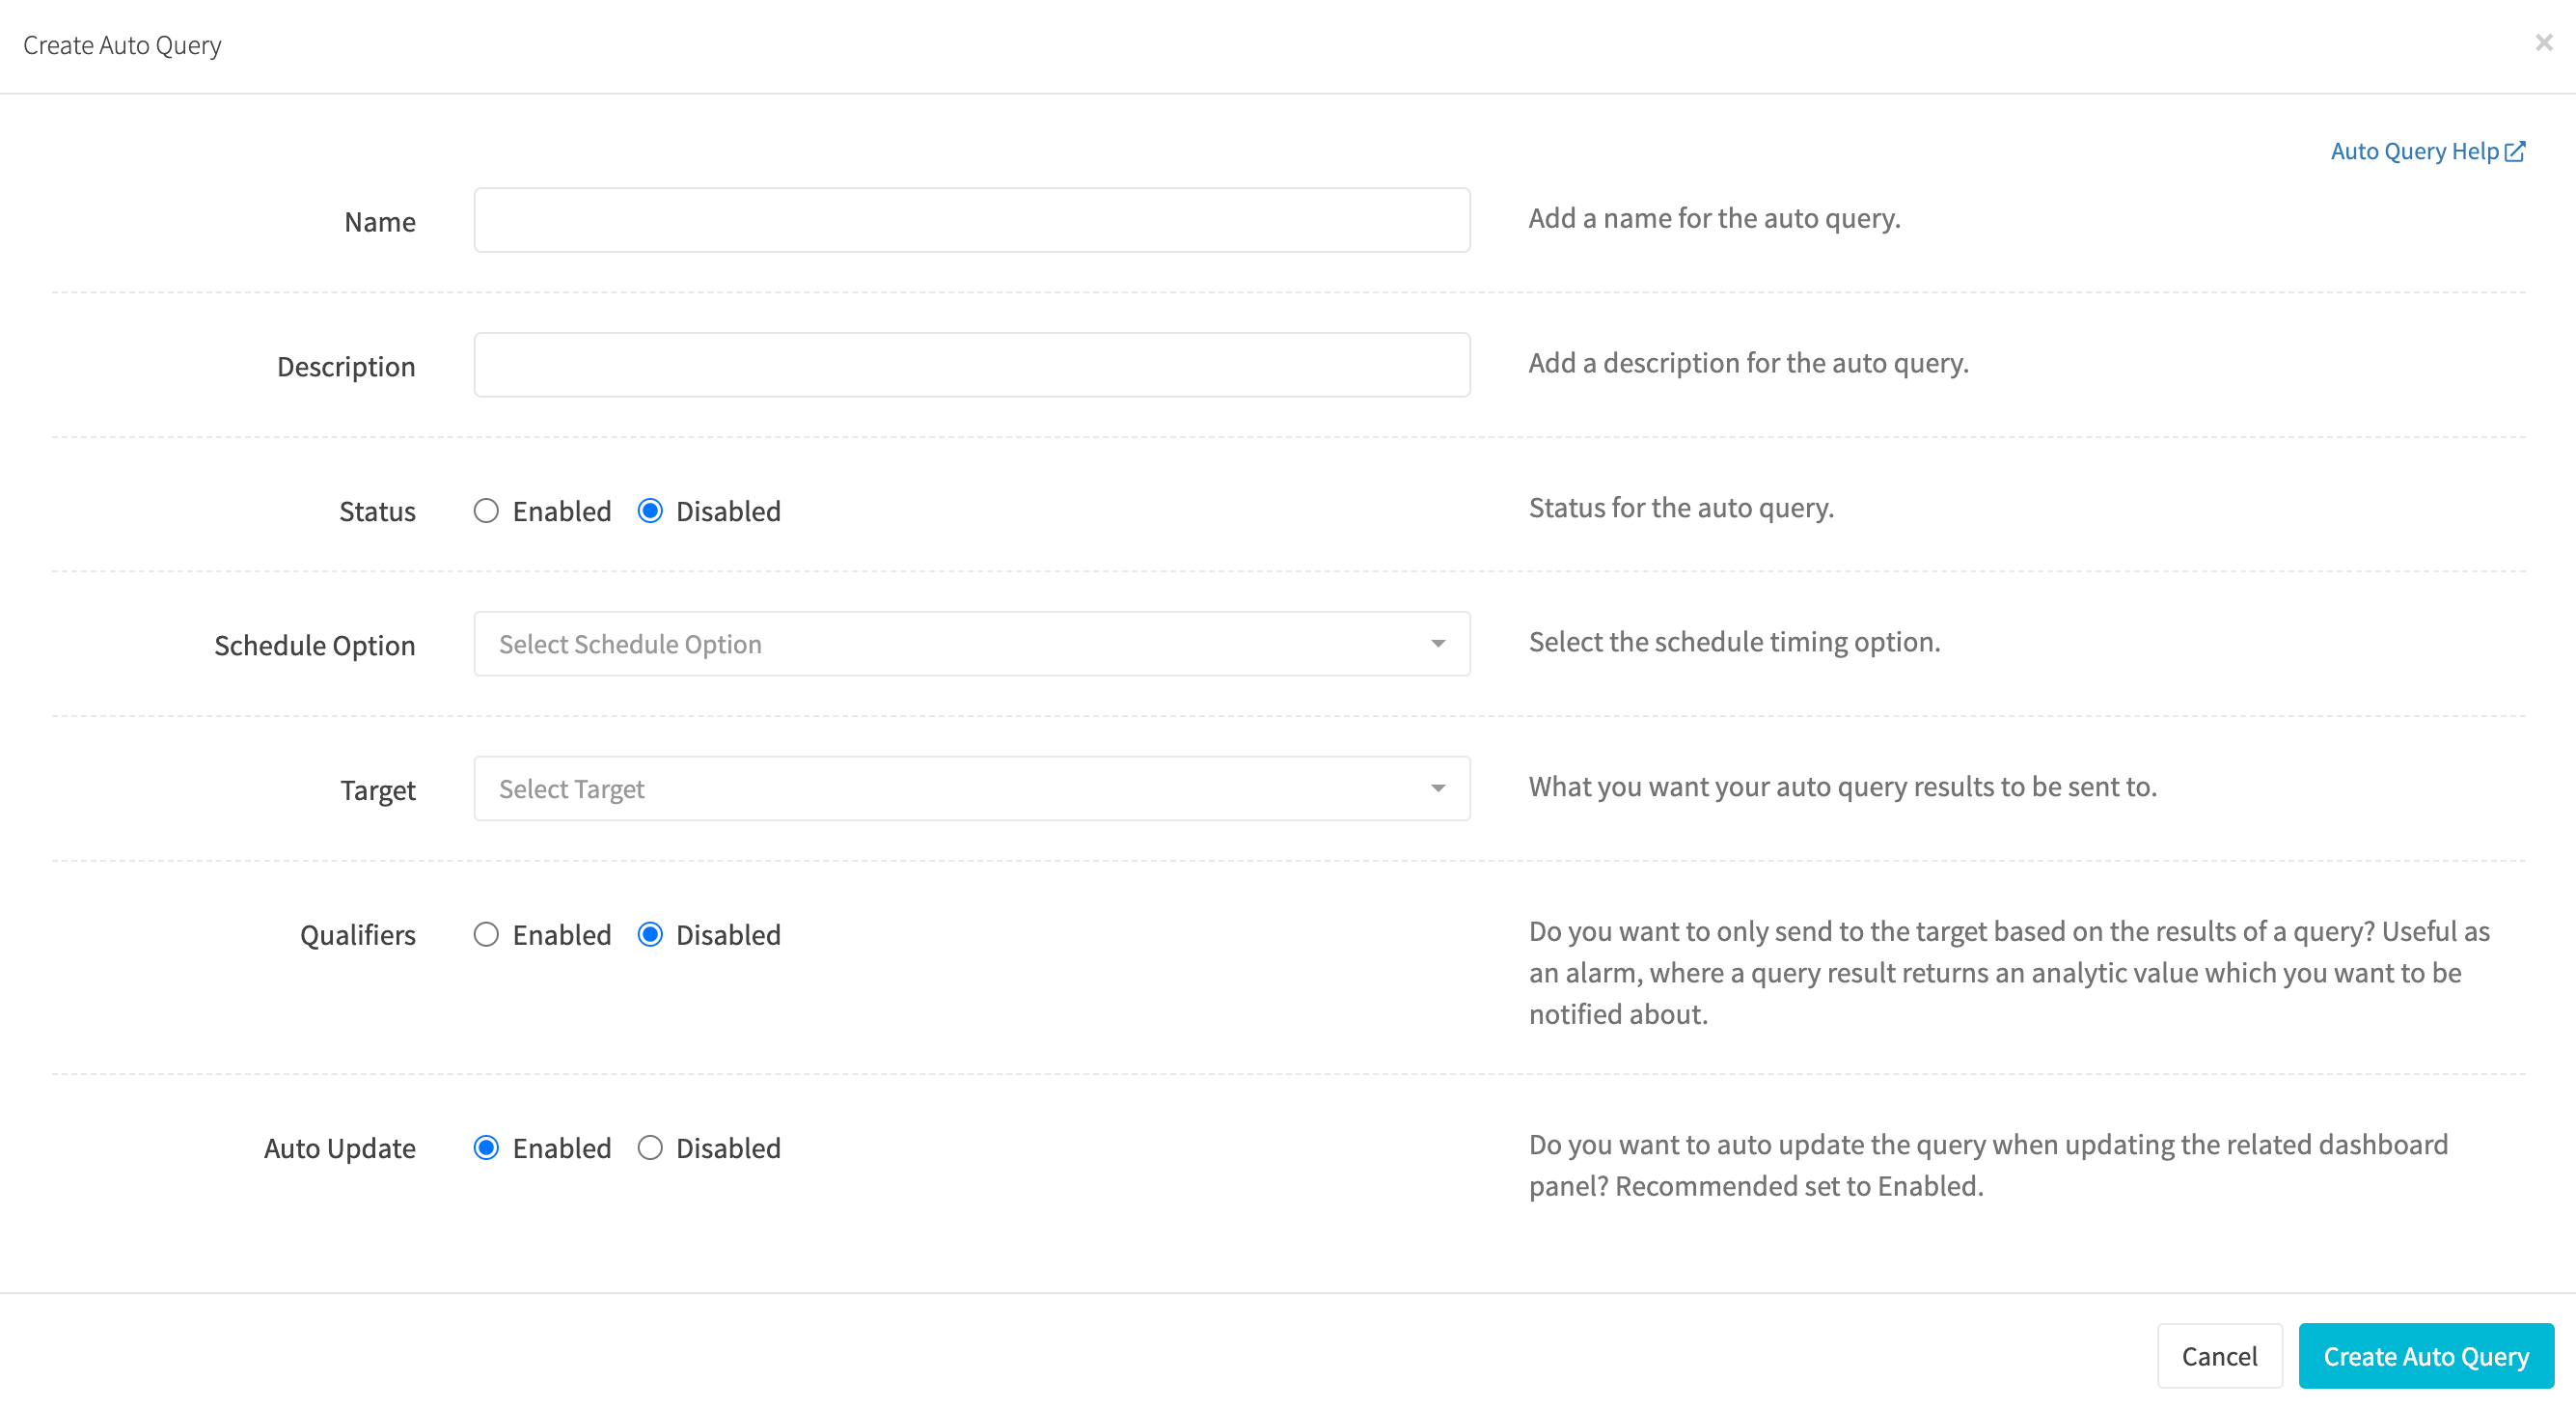
When creating or editing an auto query you will utilize the auto query modal.
¶ Schedule
Set the schedule for conducting the automated queries. There is a lot of flexibility in the timing frequency.
Note: All queries are run at the :00 minute of an hour.
¶ Hours
Run an auto query every X amount of hours.

¶ Days
Run an auto query every X amount of days at a specific time, in a specific timezone.

¶ Weeks
Run an auto query every X amount of weeks on a specific day, at a specific time, in a specific timezone.

¶ Months
Run an auto query every X amount of months on a specific day of the month, at a specific time, in a specific timezone.

¶ Auto Query Target
The target is where you want your auto query results to be sent to. After the query is finished running, the target will receive the results, and depending on the target, will perform various actions.
¶ Email Template
Select a target email template if you want to receive the auto query results via email. You can have a CSV file of the query results attached to the email as well. An email template is the recommended method if you wish to receive a CSV file of the query results, or have the contents of the email contain the query results using handlebars syntax.
Note: Empty query results will not be sent to an Email Template.

¶ Function
Select a target function to analyze the query results using code. A function is the recommended method if you wish to process query results and programmatically notify third party channels, enable/disable gateways in Revcent, or take any other action that can be done using code.
Note: Empty query results will be sent to a Function. Use a qualifier to not send to a function on empty results.

¶ AI Assistant
Select a target AI Assistant to run an AI chat on the query results and email you a summary, etc. You can have a CSV file of the query results attached to the resulting email as well.
Note: Empty query results will be sent to an AI Assistant. Use a qualifier to not send to an AI Assistant on empty results.

¶ Key Value
Select a target Key Value to update the value using the results of the query. Query results will be converted to a JSON string before being saved as the keys' value.
Note: Empty query results will be saved as the key value. Use a qualifier to not save a key value on empty results.

¶ Event Data
Both the function and the email template will receive the query results within an array. Easily parse query results by looping through the results array.
The example event object below is shows the results array property.
{
  "results": [
    {
      "group_by_value": "Bundle Product",
      "sale_sum_amount_gross": 625.92
    },
    {
      "group_by_value": "Subscription Product",
      "sale_sum_amount_gross": 208.64
    }
  ]
}
¶ Qualifiers
Use qualifiers if you want to only send to the target based on the results of a query. Useful as an alarm, where a query result returns an analytic value which you want to be notified about.
Add a qualifier by clicking the Add Qualifier button to add one or more qualifiers.
Note: Multiple qualifiers are treated as AND statements.

¶ Example Qualifier
In the example qualifier below, we want to be notified only if the chargeback percentage is above 2. The auto query will run, the results analyzed, and if the analytic Chargeback % is above 2, then the target will be notified. If the qualifier does not pass, the target is not notified and the auto query schedule continues.

¶ Qualifier Cooldown
You can choose to only send to the target once within a specific period of time. This is useful if you want to be notified when a qualifier passes, however you do not want to be notified within a certain period of time afterwards.
Example: An auto query runs every hour and notifies you if a chargeback % is above a certain number. However, once notified you do not need to be notified again for an X amount of time. This is where the cooldown is useful. You don't want to keep getting bombarded every hour as the chargeback % may not decrease for at least a day.
